
Simple Baked Kale Chips
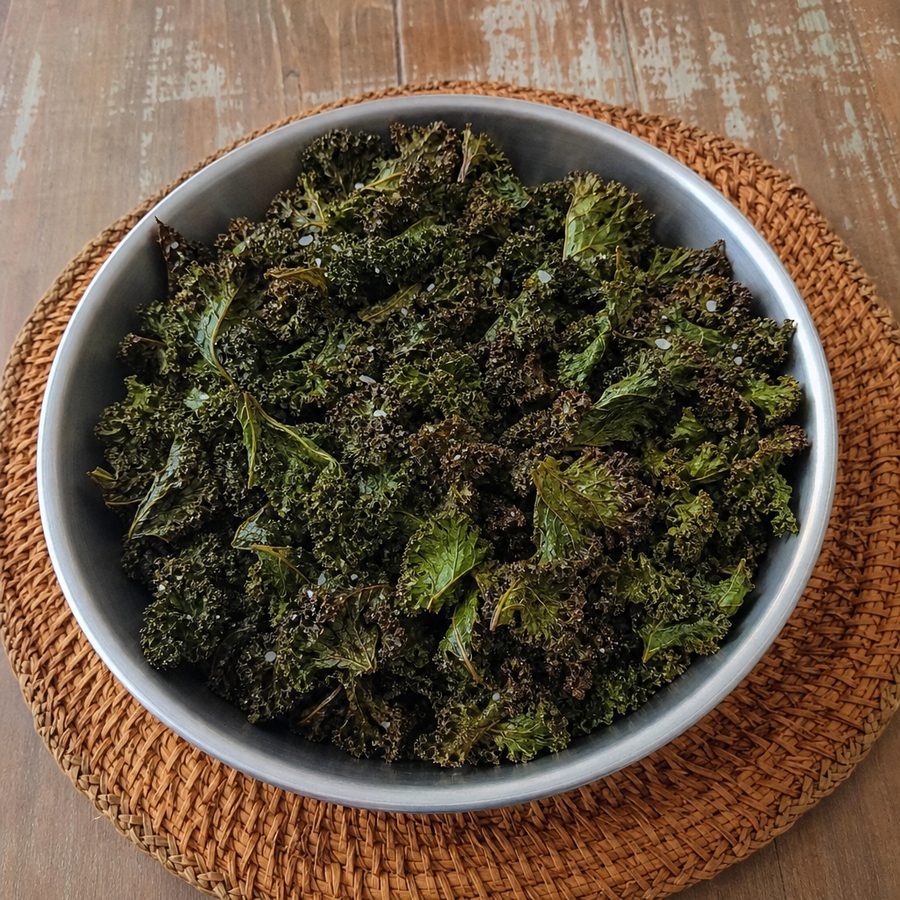
Curly kale leaves crisped low and slow into shatteringly light chips with just olive oil and sea salt.
Why You'll Love This Recipe
This is the one for the afternoon when what you want is salty and crunchy, and the only thing in the house that qualifies comes out of a bag. A bunch of kale, olive oil, and salt is the entire list, and the oven does almost all of the work while you get on with something else. Ten minutes of hands-on time means you can start it when the craving turns up instead of planning around it.
Low and slow is what makes it work. At 300°F (150°C) the water leaves the leaf gradually and the kale dries into something brittle, where a hot oven scorches the frilled edges before the middle has given up its moisture. Rubbing the oil in with your hands rather than pouring it over gets a thin film onto every ruffle, and the salt goes on after the oil so it stays where you put it.
What you end up with actually crunches. The chip shatters when you bite it, the salt lands first, and the green, faintly bitter flavor of the kale arrives just behind it. The olive oil is doing more than crisping the leaves, since the fat is a good part of why a handful holds you rather than leaving you back in the pantry ten minutes later. A whole bunch cooks down to one bowl, which tells you most of what you need to know about how fast they go.
Ingredients
- 1 large bunch kale (about 200 g), stemmed
- 2 tbsp olive oil
- 1/2 tsp sea salt
Instructions
- Stem: Heat the oven to 300°F (150°C) and line two rimmed sheet pans with parchment. Hold each kale stem in one hand and strip the leaf off with the other, then tear the leaves into pieces about the size of your palm, since they shrink by more than half.
- Dry: Wash the leaves and dry them thoroughly, a salad spinner first and then a towel. Any water left on the leaf turns to steam in the oven and gives you leathery kale instead of a chip, so this is the step to be fussy about.
- Season: Put the kale in a large bowl, pour the olive oil over it, and rub it in with your hands for a minute until every ruffle has a thin film on it and no leaf is left dull. Sprinkle the salt on after the oil so it sticks.
- Bake: Spread the leaves in a single layer across both pans, with no overlap, and bake 20 to 22 minutes, rotating and swapping the pans halfway. Pull them when they are dry and papery but still deep green, before the edges brown.
- Cool: Let them sit on the trays 5 minutes. They finish crisping as they cool, so a chip that seems slightly soft coming out of the oven usually is not once it has cooled.
Variations
- Lemon and garlic: Grate a clove of garlic into the oil before you rub it in, and grate lemon zest over the chips the moment they come out of the oven while they are still warm.
- Rosemary: Chop a teaspoon of fresh rosemary as fine as you can and add it with the salt, which gives them a woodsy, cracker-like edge.
- Smoked salt: Swap the sea salt for a smoked one and use a little less, since smoked salts read stronger on the tongue than plain flakes do.
- Collards or chard: Collard leaves crisp the same way and want a few extra minutes; chard is thinner and is usually done closer to 15, so start checking early.
- Nutritional yeast: A tablespoon tossed over the warm chips gives them a savory, almost cheesy finish. It is not part of an AIP elimination phase, so save this one for after reintroductions.
Storage & Leftovers
Let them cool all the way on the trays before they go anywhere, which takes about ten minutes. Sealing a chip that is still warm traps steam in the container, and you will open it later to something bendy. Once they are cool, an airtight container with a folded paper towel in the bottom keeps them crisp on the counter for about three days.
They give up a little crunch every day even so, and by the third one they are closer to soft than crisp. That is fixable. Spread them back on a sheet pan, give them five minutes at 300°F (150°C), and let them cool again on the pan. It drives off the moisture they picked up and brings most of the snap back.
Skip the refrigerator, which is humid enough to soften them overnight, and skip the freezer for the same reason. If you want a head start, wash and dry the kale a day ahead and keep the torn leaves in the refrigerator loosely wrapped in a dry towel, then oil, salt, and bake when you want them.
Notes & Tips
- Dry the leaves like you mean it: Spinner first, then a towel, and take the extra minute. Damp kale steams in the oven and comes out leathery no matter how long you leave it in there.
- Tear big: The pieces lose more than half their size in the oven, so palm-sized going in is about right. Anything smaller than that ends up as dust in the bottom of the bowl.
- Use two pans: Leaves that overlap trap steam between them and stay soft in the middle of the pile. A single uncrowded layer across two sheets is the difference between crisp and half-crisp.
- Rub the oil in, do not pour it on: Poured oil pools in the ruffles and leaves the rest of the leaf dry, and the dry parts burn while the wet parts stew. A minute of hands in the bowl fixes it.
- Go lighter on the salt than feels right: The kale shrinks in the oven and the salt does not, so what tastes about right on the raw leaf tastes sharp on the finished chip.
- Pull them pale: Brown edges taste bitter, and they will get there fast at the end. Take them out when they look a shade underdone and let the trays finish the job.
Nutrition & Mindful Eating
- Kale, olive oil, and salt are the entire list, and each one has a job. The oil coats every ruffle so the heat reaches all of it, the salt sharpens what the leaf already tastes like, and the kale brings the vitamin K and carotenoids that come with dark greens.
- Curly kale is the right leaf for this because its ruffled edges catch the oil and crisp first while the flatter middle catches up. Baked low and slow it turns deep green and brittle, holding on to the lutein that gives those leaves their color.
- Olive oil rubbed into the leaves by hand, not poured over them, is what makes the difference, because every surface needs a film of it. Its fat is also what helps your body take up the fat-soluble vitamins the greens carry.
- The sound is the test. A chip that shatters when you press it is ready, and one that bends went into the oven damp or came out early, so dry the leaves properly and give them room on the pan.
- A whole bunch collapses into a single bowl in the oven, which is why these disappear at the speed they do. They are light and crackly, salted at the edges, and green all the way through the flavor.
- As you eat, listen for the crack of each chip and notice how the salt lands first and the green flavor arrives after it, and take them one at a time so the bowl lasts longer than it means to.
Frequently Asked Questions
Why did my chips come out soggy?
Nine times out of ten it is water still on the leaves when they went in the oven, so dry them more thoroughly than seems necessary. The other two causes are a crowded pan, where the leaves steam each other, and sealing them in a container before they had cooled. Let them cool uncovered on the tray and lid them only once they snap.
Can I use a different green?
Yes. Collard greens are the closest match and take a few minutes longer because the leaf is thicker. Swiss chard works too and goes faster, so check it at 15 minutes. Spinach is the one I would skip, since the leaves are so thin they tend to go from limp to burnt with almost nothing in between.
Can I make these ahead for the week?
You can, with the understanding that they are at their best the day you bake them. Cooled completely and kept in an airtight container with a paper towel, they hold for about three days on the counter. If they soften, five minutes back in a 300°F oven brings them around. What does keep well is the prep, so wash and tear the kale a day ahead and bake it fresh.
Do these fit an AIP elimination phase?
They do. Kale, olive oil, and sea salt are the whole recipe, with no grains, seeds, nightshades, dairy, or eggs anywhere in it. The thing to watch is the seasoning, since a garlic or onion powder blend is fine while anything carrying paprika, pepper, or chili flakes is not. If you are adding one of the variations, the nutritional yeast is the one to hold until after reintroductions.