
Chicken Thighs Cooked Under a Weight
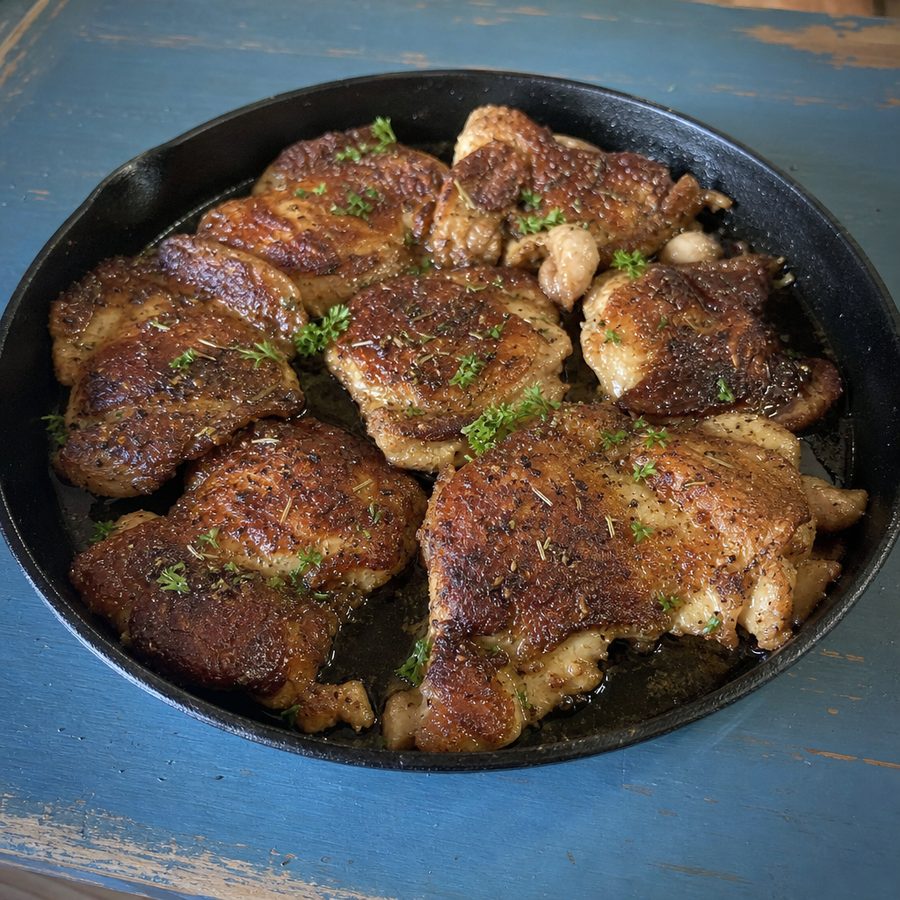
Skin-on chicken thighs started in a cold dry pan and pressed flat under a second skillet, so the skin fries in its own rendered fat until it is glass thin.
Why You'll Love This Recipe
Chicken thighs are the cut I reach for on a weeknight, and this is the method that finally got me skin I did not want to apologize for. The trick is not high heat, it is patience and pressure. The thighs go into a cold, dry skillet skin side down, a second heavy pan goes on top of them, and the burner comes up slowly to medium. Fat renders out gradually, pools around the meat, and by minute ten the thighs are effectively frying in their own schmaltz. That slow start is what gets the fat out; the weight is what makes the skin flat enough to crisp all the way across.
Listen to it while it cooks, because the pan tells you exactly where you are. The first few minutes are almost silent. Then a low sizzle starts as the fat begins to run, builds into a steady loud frying sound, and eventually settles into a finer, drier crackle, which is the signal that the water has gone and the browning is nearly done. By then the kitchen smells like roast chicken even though nothing has been near an oven. The meat comes out juicy because dark thigh meat is forgiving, and the skin comes out like a thin sheet of glass.
This is a two-ingredient dinner that eats like something you worked at, and it is my answer to the nights when I want a real plate of food and have nothing planned. It leaves a pan of clean golden schmaltz behind, which I pour into a jar and keep in the refrigerator for the rest of the week, and it is the best fat in the house for frying an egg or starting the next batch of thighs. It also scales without any fuss, since a twelve-inch skillet takes eight boneless thighs comfortably and a griddle takes twelve, and there is nothing to time except the sound coming off the pan. I make it most often on a Tuesday, when the reward has to be out of proportion to the effort.
Ingredients
- 8 boneless, skin-on chicken thighs (about 2 lb), patted very dry
- 3/4 tsp fine sea salt
Instructions
- Dry the thighs and salt them: Blot both sides of each thigh with paper towel, then go over the skin a second time and press until the towel comes away nearly dry. Wet skin steams instead of rendering. Salt the skin side and the flesh side, and if you have a spare twenty minutes, leave them uncovered on a rack in the refrigerator to dry further.
- Start in a cold, dry pan: Lay the thighs skin side down in a cold twelve-inch cast iron skillet, spread flat and not touching, and add no fat at all. Set a second heavy skillet or a foil-wrapped brick directly on top of them, then turn the burner to medium. A cold start gives the fat time to run out before the skin can seize and buckle.
- Render and press: Cook undisturbed for fourteen to sixteen minutes. The pan will be quiet at first, then build to a steady frying sound as the fat pools, and finally settle into a finer crackle. Around minute ten, lift the weight and carefully pour off most of the schmaltz into a heatproof jar, keeping about a tablespoon in the pan, then set the weight back on.
- Check the skin and flip: Lift one thigh with tongs. The skin should be deep chestnut brown, flat, and rigid enough to hold its shape off the pan. If it is still blond, give it three more minutes under the weight. Once it is right, turn the thighs over, take the weight off, and cook two to four minutes more on the flesh side.
- Rest them skin side up: The thighs are done when an instant-read thermometer at the thickest point reads 175°F and the juices run clear. Move them to a board or a warm plate skin side up, never skin side down, and rest for five minutes. Resting on the skin is the one thing that will undo all that work, since the trapped steam softens it in under a minute.
Variations
- Finish with butter: Once the thighs are flipped, drop a knob of butter in and spoon the foaming fat over the flesh side for the last two minutes.
- Cheese-crisped: Scatter grated parmesan into the empty hot pan after the thighs come out and let it melt into a lacy wafer to break over the top.
- Duck fat start: Add a teaspoon of duck fat or bacon fat to the cold pan for a deeper, savorier crust while the chicken renders its own.
- Fried egg on top: Crack eggs into the reserved schmaltz once the thighs are resting and set one on each portion with the yolk still loose.
- Turkey thighs: The same weighted method works on boneless turkey thigh, which is thicker and wants about ten extra minutes under the pan.
Storage & Leftovers
Cooled thighs keep four days in a sealed container in the refrigerator, and cold roast chicken thigh is one of the better things to find in there. Store them skin side up in a single layer if you can, since stacking presses the softened skin against the meat below.
Reheat in a dry skillet over medium heat, skin side down, for three or four minutes with no lid. That drives off the moisture the refrigerator put back and brings the crackle most of the way home. A microwave will heat the meat perfectly well and turn the skin to leather, so pull the skin off first if that is the route you are taking.
They freeze for up to three months, wrapped tightly in flat single layers. Thaw overnight in the refrigerator and finish them skin side down in a hot dry pan. Keep the jar of rendered schmaltz in the refrigerator too; it holds for a month and is the best fat in the house for frying eggs.
Notes & Tips
- Dry skin is crisp skin: Every bit of surface water has to boil off before browning starts. A hard blot with paper towel, and ideally an hour uncovered in the refrigerator, is the whole difference.
- No fat in the pan to start: The thighs bring more than enough of their own. Adding fat at the beginning only floats the skin off the metal and slows the rendering down.
- Pour the schmaltz off partway: Once the pool gets deep the skin poaches rather than fries. Take most of it out around minute ten and save it; it is the best thing to come off this pan.
- Go by sound: Loud, wet, fast sizzling means water is still leaving. A finer, drier crackle means it has gone and the skin is browning, which is your cue to look.
- Cook thighs to 175°F, not 165°F: Dark meat has connective tissue that needs the extra ten degrees to soften. Pulled at 165°F a thigh is safe but chewy, and at 175°F it is tender and still juicy.
- Rest them skin side up: Set a crisp thigh down on its skin and the steam underneath softens it within a minute. Skin side up on a board, always.
Nutrition & Mindful Eating
- This is chicken thigh and salt, and the two of them plus the technique are the entire dish. The dark meat gives it the depth and the juice, the skin turns into both the crust and the cooking fat, and the salt is what pulls the flavor of the meat forward.
- Chicken thigh is the working muscle of the bird, which is why it is darker, looser grained, and more forgiving than breast meat. That darkness comes from myoglobin, and it is why thigh carries noticeably more iron and zinc along with all its protein.
- The skin is not a garnish here, it is the cooking medium. Held flat against the pan it releases clean golden fat over about fifteen minutes, and what is left is a thin brittle sheet that snaps rather than bends.
- Slow rendering builds flavor that high heat cannot. The proteins and the traces of sugar in the skin brown together into hundreds of new aromatic compounds, which is why a pan of this smells like a whole roast chicken from about minute eight onward.
- Two thighs eat like a full dinner, and the protein in dark meat together with the fat that stayed on it is what makes that true. Salt goes on before the pan so it has time to work into the surface rather than sitting on top of the crust.
- As you eat, break the skin first and listen to it, then notice how loose and juicy the meat underneath has stayed, and give the plate the twenty quiet minutes it took to make.
Frequently Asked Questions
Can I use bone-in thighs?
You can, but they will not press flat, so the skin crisps unevenly and the cook time goes up to about thirty minutes. If bone-in is what you have, cut along the bone and remove it first, or accept a patchier skin. Boneless, skin-on thighs are worth asking the butcher for.
What do I use as the weight?
A second cast iron skillet is ideal. A heavy saucepan works, as does a foil-wrapped brick or a couple of cans in a pan. It does not need to be crushing, only heavy enough to hold the skin flat against the metal, so somewhere around three or four pounds is plenty.
Why start in a cold pan? Everything else says preheat.
A hot pan seizes the skin instantly and locks the fat inside, which is how you end up with skin that is browned on the outside and rubbery underneath. Starting cold gives the fat fifteen minutes to render out slowly, and the skin then fries in what it released.
Two ingredients. Is that really all of it?
It is. The chicken and the salt, and the pressure and the timing do everything else. If you are keeping your meals to animal foods, this is written that way from the start, and the jar of schmaltz it leaves behind is the beginning of the next few dinners.