
Salt-Cured Oven Beef Jerky
Thin strips of top round salted and dried low in the oven into chewy, savory jerky.
Why You'll Love This Recipe
Four hours in a low oven is the shape of this recipe, so it belongs to an afternoon when the oven can be tied up and nobody minds. Hardly any of that time is work. Two ingredients, top round and coarse salt, and there is nothing else in it, which is more than can be said for anything on the jerky shelf at a gas station.
Freeze the beef for forty-five minutes before you slice it. Firm meat slices thin and even, where room-temperature meat drags under the knife and gives you strips of six different thicknesses that dry at six different rates. Slice across the grain if you want jerky you can bite through cleanly, and with the grain if you want the chewier kind that lasts. Either works, but pick one and cut the whole piece the same way, since a tray of both is a tray where half of it is done before the rest.
It is beef and salt and nothing else, so a piece is protein with very little else attached, and it keeps in a sealed jar for a couple of weeks. That is the argument for making it rather than buying it, since most jerky on a shelf carries sugar, soy, and a list of things that are there to keep it soft on the shelf rather than to make it taste better. A pound of eye of round gives you a jar that lasts, and you know exactly what went into it. Our Bacon-Wrapped Chicken Bites comes out of the oven with a similar job to do.
Ingredients
- 1 1/2 lb beef top round, thinly sliced
- 1 tsp coarse salt
Instructions
- Firm it in the freezer, then slice it thin: Put the beef in the freezer for forty-five minutes, until the outside is firm and the middle still gives under your thumb. Cold meat holds still under a knife and lets you cut far thinner than you can at room temperature, and thin is the whole difference between jerky and dried steak. Cut across the grain at about an eighth of an inch for strips that break cleanly when you bite them, or with the grain if you want a long, chewy piece. Keep the thickness even, because thin strips finish an hour before thick ones.
- Trim off every piece of fat you can see: Go over the sliced strips and cut away the fat along the edges and any thick seam running through the middle. Fat does not dry, so it stays soft while the meat around it goes firm, and it is the first thing in the jar to turn rancid. Top round makes this quick, since most of its fat sits on the outside of the muscle rather than running through it. Five minutes here is the difference between a batch that keeps for two weeks and one that is off in a few days.
- Salt it and let it sit fifteen minutes: Toss the strips with the coarse salt in a bowl until every piece carries some, then leave them for a quarter of an hour. The salt pulls moisture to the surface and then draws back in with it, which seasons the strips through rather than only on the outside, and it gets a head start on the water the oven has to remove. A teaspoon across a pound and a half sounds like almost nothing, and it is right, because the strips lose about two thirds of their weight and the salt concentrates as they shrink.
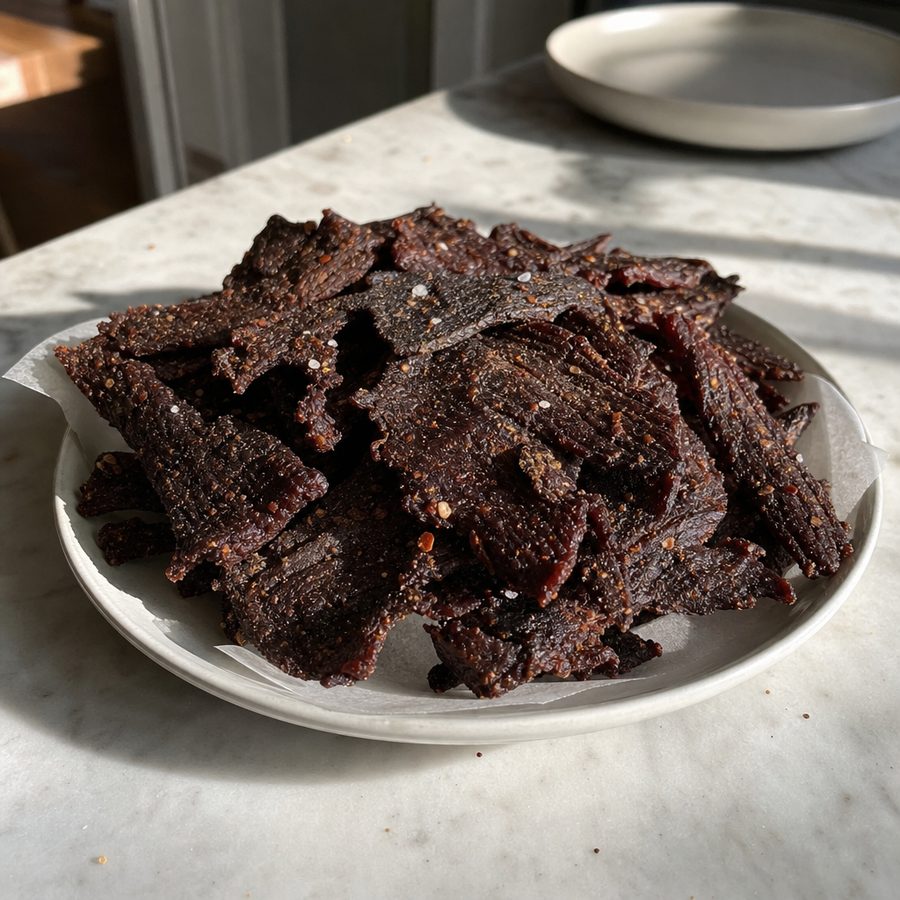
- Dry it low, with the air moving: Heat the oven to 175°F (80°C). Lay the strips flat on wire racks set over sheet pans, not touching each other, so air can reach both faces at once. Prop the oven door open an inch with the handle of a wooden spoon; without that gap, the moisture the beef gives up has nowhere to go and the strips steam rather than dry. Give it about three and a half hours, turning the pans front to back halfway through, until the strips are firm and leathery and bend without snapping.
- Finish it hot for ten minutes: Raise the oven to 275°F (135°C) and leave the strips in for ten more minutes. This is the step that makes jerky made at home safe to eat. Drying at 175°F removes water so quickly that evaporation keeps the surface of the meat cooler than the oven around it, which means strips can come out perfectly leathery without ever having been hot enough to kill what may have been on the raw beef. Ten minutes at 275°F carries them through 160°F all the way through, and it costs nothing in texture.
- Cool it completely before it goes into a jar: Move the racks to the counter and leave the strips alone for an hour. They firm up noticeably as they come down to room temperature, so a piece that felt slightly underdone coming out of the oven is often right once it is cold, and judging a batch while it is still hot is how people overdry the next one. Only when the strips are completely cool should they go into a jar or a bag.
Variations
- Add more protein: there is nothing to add here. Anything you stirred in would hold moisture and keep the beef from drying properly, which is the whole point of the method.
- Add more vegetables: jerky is protein by itself. Carrot sticks, snap peas, or cherry tomatoes alongside turn it into an actual snack, though tomatoes are a nightshade and the autoimmune protocol leaves them out.
- Make it spicy: toss the strips with cayenne or coarse black pepper along with the salt, since dry seasoning goes on before the drying while anything wet would undo it. Cayenne is a nightshade and peppercorn is a seed, so both sit outside the autoimmune protocol.
- Season it differently: garlic powder, onion powder, smoked paprika or a little ground coriander all rub on dry with the salt and survive the low oven. Garlic and onion suit every version, while paprika is a nightshade and coriander is a seed, so save those two for when you are not on the autoimmune protocol.
- Change the cut: eye of round and bottom round both slice and dry the same way as top round. What matters is trimming off every bit of fat, since fat does not dry and will turn rancid.
Storage & Leftovers
Cool the strips completely before anything goes into a container. Jerky that is still warm gives off steam, and that steam becomes beads of water on the inside of the jar, which is exactly the moisture you spent four hours removing. Check the jar the next morning: if you see condensation on the glass, the batch was not dry enough, so spread the strips back on the racks for another half hour at 175°F (80°C) and cool them again.
Sealed in a jar or a bag with the air pressed out, properly dried jerky holds about two weeks at room temperature, a month or two in the refrigerator, and several months in the freezer. There is no curing salt in this recipe, only sea salt, so the refrigerator is the sensible default for anything you are not planning to eat that week, and the two weeks on the counter is for the bag that travels.
Fat is what limits how long a batch lasts, not the drying. Any fat left on the strips never dries out with the rest of the meat, and it turns rancid well before the beef does, which is why the trimming matters as much as the oven time. If a piece smells sharp or almost paint-like when you open the jar, that is fat that got missed, and nothing about how it is stored will bring it back.
Notes & Tips
- Slice thin and consistent: against the grain gives tender jerky, with the grain gives chewy. Freezing the roast partway first makes thin slices much easier to cut.
- Trim every bit of fat: fat will not dry the way muscle does, and any left on the strips is what makes a batch go off early.
- Do not crowd the racks: air has to move around each strip, so leave space between them and rotate the pans partway through.
- Prop the oven door: a wooden spoon in the door lets the moisture escape instead of steaming the beef you are trying to dry.
- Test it bent, not hot: a strip is done when it cracks but does not snap as you bend it, and it will always seem softer while still warm.
- Store it dry: cool the jerky completely before it goes into a container, because sealing in any warmth traps moisture and shortens how long it keeps.
Nutrition & Mindful Eating
- Beef, salt and time are the entire recipe. The salt pulls moisture to the surface, the low oven carries it off over hours, and what is left behind is the same beef with all its flavor drawn tight.
- Top round is close-grained and firm, which is exactly what a strip needs in order to hold together as it dries. It carries dense protein along with iron in the heme form your body absorbs most readily.
- Beef also brings zinc and B12, and since drying takes the water out and leaves everything else in place, a small handful of jerky is a good deal more meat than it looks like.
- Slicing thin and against the grain decides the chew. Cut thick, a strip fights you; cut thin, it tears cleanly between your teeth and still gives you something to work on.
- Salt is doing more than seasoning here. It draws water out so the oven can finish the job, and it is what keeps the beef flavor from going flat over hours of slow drying that scents the whole house.
- As you eat, let each piece take the time the chewing asks for, notice how concentrated the beef flavor has become, and treat a small handful as something to taste rather than something to get through.
Frequently Asked Questions
How dry should it be?
It should bend and crack but not snap. Fully brittle means it went too long.
Can I use a different cut?
Top round or eye of round are ideal; trim all visible fat, which does not dry well.
How long does it keep?
Sealed with the air pressed out, about two weeks at room temperature, a month or two in the refrigerator, and several months in the freezer. There is no curing salt here, only sea salt, so refrigerate anything you are not eating within the week, and check the jar for condensation the morning after you make it.
Can I make it ahead?
That is more or less what jerky is for. A pound and a half of top round comes out at roughly six ounces of finished strips, so it is worth drying two batches while the oven is already on and the racks are already dirty. Cool and seal them separately, and open one jar at a time so the rest is not exposed to air every day.