
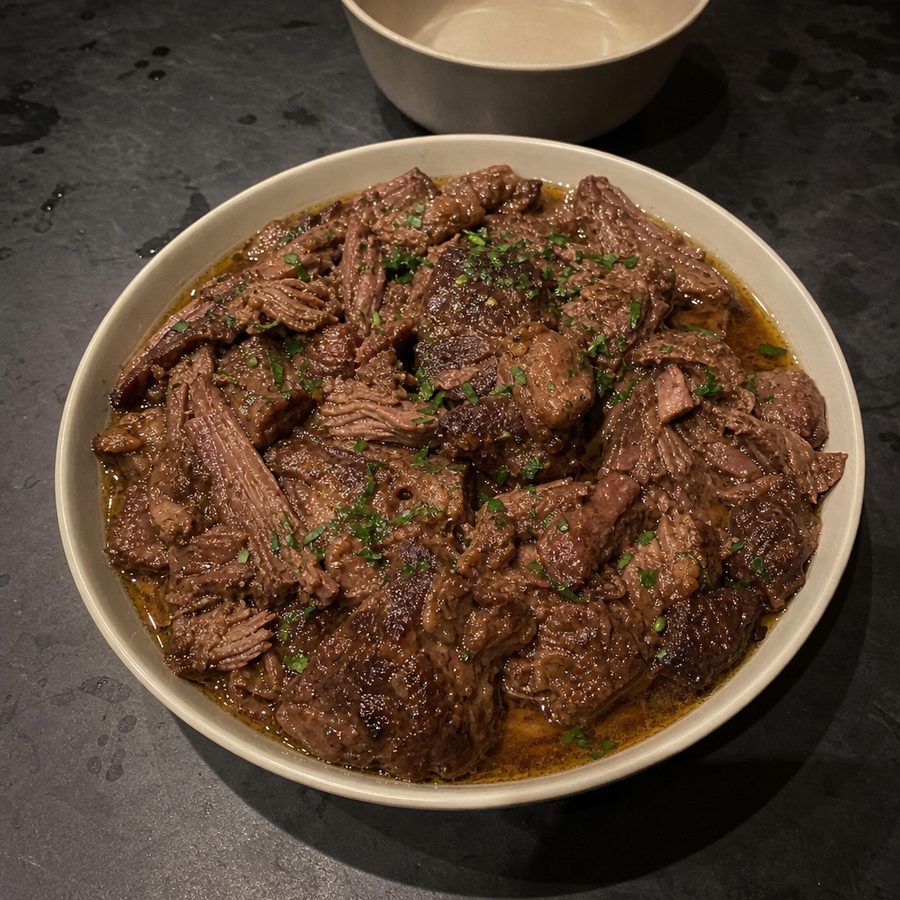
Braised Beef in Buttery Pan Juices
beef sirloin chuck braised low and slow until fork-tender, then bathed in its own reduced pan juices swirled with butter and salt.
Why You'll Love This Recipe
This is a plain, deeply savory dinner for anyone who wants beef to be the whole point of the plate. Three ingredients, one of which is salt. It leans on a well-marbled, collagen-rich cut and treats it simply, so the meat itself has to carry the meal, and with two and a half hours of gentle heat behind it, it does. If you like fork-tender, spoonable beef and want the shortest ingredient list on the site, this is the one.
Low heat, held for a long time. A tough working cut like chuck or short rib is full of connective tissue that stays chewy at high heat but slowly melts into gelatin when held for hours at a gentle temperature. That gelatin is what gives braised beef its silky mouthfeel and turns the pan drippings into a sauce that clings. The initial sear adds browned, roasted flavor to the surface, and the final swirl of butter rounds the reduced juices into something glossy and rich.
Honest food: real beef, real butter, real pan juices, and nothing at all to distract from them. Beef delivers complete protein and staying power, the rendered fat and butter make it filling, and the long braise coaxes out flavor without any need for a long shopping list. It is the kind of dinner that feels like a treat while being about as straightforward as cooking gets.
Ingredients
- 2 1/2 lb beef chuck or short rib
- 3 tbsp butter
- 1 tsp salt
Instructions
- Season and sear the beef hard: Pat the beef dry with paper towels and season it all over with salt. Melt some of the butter in a Dutch oven over medium-high heat until it foams and the foam subsides, then add the beef and sear, turning as each face releases from the pan, until it is deeply browned on every side, a few minutes each. Browning builds the deep flavor and color of the finished dish; it does not seal in juices, since that idea has been tested and disproved many times over.
- Braise it covered at 300°F for about 2 1/2 hours: Heat the oven to 300°F (150°C), cover the Dutch oven tightly with its lid, and put it in. Braise for about 2 1/2 hours, until the beef is fork-tender and pulls apart under light pressure; an instant-read thermometer in the thickest part will read around 200°F (95°C) by then. Check once partway through and add a splash of water if the pot looks dry, because a dry pot scorches the fond and the sauce comes out bitter.
- Test it with a fork rather than the clock: Start checking at two and a half hours and be prepared to give it longer. What you are waiting for is not a temperature in the usual sense but a change: the collagen holding a working muscle together only turns to gelatin somewhere around 195 to 205°F, and it takes hours at that heat rather than minutes. A fork twisted into the meat should meet almost no resistance and the fibers should separate on their own. If it still feels tight, put the lid back on and give it another half hour, because there is no way to hurry this and nothing is lost by waiting.
- Skim the fat, then reduce the juices: Move the beef to a plate and tent it loosely with foil. Tilt the pot and spoon off the fat pooling on the surface, since two and a half hours of braising renders a great deal of it and a sauce made without skimming is greasy rather than rich. Set the pot over medium heat and simmer the juices, stirring now and then, until they are slightly thickened and glossy.
- Finish with butter off a low heat: Lower the heat under the juices and swirl in the remaining butter until it melts into a silky sauce. Keep the heat low for this, because butter whisked into a hot, hard-boiling liquid splits into oil instead of thickening it. Return the beef, spoon the buttery juices over the top, and serve warm.
Variations
- Short rib swap: Trade the chuck for bone-in short ribs. They carry even more fat and connective tissue, so the sauce turns silkier and the meat falls off the bone; give them the full braising time or a touch longer.
- Tallow sear: Sear the beef in rendered beef tallow instead of butter and finish the sauce with tallow as well. This removes the dairy while keeping the same rich, beefy character.
- Bone broth braise: Braise the beef in homemade beef bone broth made from beef bones and salt only instead of water. It deepens the meaty flavor and gives the reduced sauce more body.
- Hard cheese finish: Grate a little aged hard cheese over the beef just before serving. This adds more dairy and a salty, savory edge that plays off the buttery juices.
- Marrow enrichment: Roast a few beef marrow bones alongside and scrape the soft marrow into the reduced juices in place of, or in addition to, the finishing butter. This adds another animal fat and makes the sauce especially rich.
Storage & Leftovers
Refrigerator: Cool the beef in its juices, then store it covered in the refrigerator for up to four days. Keeping the meat submerged in the buttery juices keeps it moist and stops the surface from drying out.
Reheating: Warm the beef gently in a covered pan over low heat with its juices, adding a splash of water if the sauce has set firm, until heated through. Low and slow reheating protects the tender texture; a hard boil or a long spell in the microwave can make the meat stringy and tough.
Make ahead: This dish is actually better the next day, once the flavors have settled and the fat has firmed on top. Braise it a day or two in advance, refrigerate it whole in the juices, then lift off the solidified fat cap before reheating and finishing with the butter.
Notes & Tips
- Pick the right cut: Look for a chuck roast or short rib with visible marbling and thick ribbons of connective tissue running through it. Those are the pieces that turn tender and saucy; a tight-grained cut like eye of round will stay dry no matter how long you braise it.
- Dry meat browns better: Pat the beef thoroughly dry before it hits the pan. Surface moisture steams instead of browns, and a dry surface is what gives you that deep, flavorful crust in the sear.
- Judge doneness by feel: Braised beef is not done at a set time but when a fork slides in and twists with almost no resistance. If it still feels tight, cover it and give it more time; the connective tissue simply has not finished melting.
- Save the fat cap: When you chill leftovers, the fat rises and sets into a solid layer. Instead of tossing it, save it to sear or roast other cuts of beef later; it is pure rendered flavor.
- Season in stages: Salt the raw beef before searing, then taste the reduced sauce at the end before the final butter goes in. Reducing concentrates saltiness, so a light hand early lets you adjust to taste at the finish.
- Double the batch: The oven does the same work whether you braise one piece or several, so cook extra when you have the pot going. The beef keeps well and reheats beautifully in its juices.
Nutrition & Mindful Eating
- Beef, butter and salt is the whole list, and the long braise is the fourth ingredient. The meat gives up its collagen, the butter enriches what it releases, and the salt draws the two into a sauce that needs nothing else.
- A well-marbled braising cut is what makes this possible. Its connective tissue melts into gelatin over hours in a low oven, which is where the silky texture and the body in the pan juices come from, and the meat carries iron in the form your body takes up most readily.
- The first hard sear is worth doing properly. Browning the surface in a hot pan builds the dark, roasted flavor that the braise then spreads through everything, and nothing later in the cook can put it back if you rush it.
- Butter stirred into the pan juices at the end pulls them together into something glossy that clings to the meat rather than pooling around it, and it brings the fat-soluble vitamin A that comes with real cream.
- Beef braised this long holds you for a good stretch. The protein is doing most of that work, along with the zinc and B12 that red meat carries, and it is why a small plate of this eats like a whole meal.
- As you eat, notice how little pressure the meat needs to come apart and how the buttery juices coat the back of the spoon, and treat this as a meal to sit with rather than one to get through.
Frequently Asked Questions
Should I use chuck or short rib?
Either works well. Chuck gives you a large, sliceable piece with even marbling, while short rib is fattier and richer and tends to fall apart into strands. Both have the connective tissue that makes braised beef tender, so choose based on whether you want slices or pull-apart meat.
My beef is still tough after the braising time. What went wrong?
It almost always just needs more time. Toughness in a braise means the connective tissue has not fully melted yet, so cover it and keep cooking until a fork twists in easily. Rushing with higher heat will not fix it and can dry the meat out.
Do I really only add water if the pan runs dry?
Yes. The covered pot traps steam and the beef releases its own juices as it cooks, so it usually needs no added liquid. A splash of water is only insurance against the pan drying out and scorching.
Can I make this without an oven?
You can braise it entirely on the stovetop. Keep the covered pot over the lowest steady heat that maintains a bare simmer and cook until fork-tender, checking now and then that it is not drying out, then reduce and finish the juices the same way.