
Seared Duck Breast and Eggs
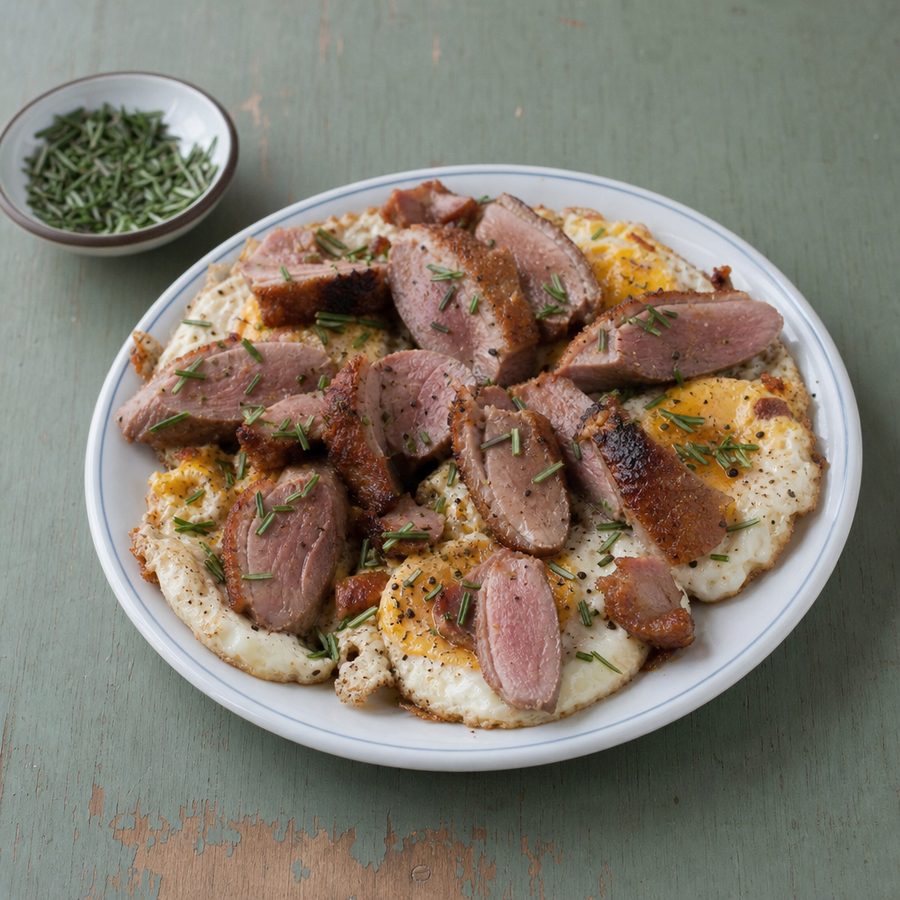
Crispy-skinned duck breast, seared to a rosy medium-rare and sliced thin, fanned over eggs fried in butter and seasoned simply with salt.
Why You'll Love This Recipe
This is a rich, unhurried breakfast for anyone who wants real substance in the morning rather than something sweet. Duck breast has the deep, savory flavor of red meat but cooks in a single skillet in about the time it takes to fry a couple of eggs, which makes it feel like a restaurant plate you can pull off at home. It is built around just meat, eggs, butter, and salt, so the ingredients do all the talking.
The whole dish turns on how you handle the skin. Laying the duck in a cold pan and bringing the heat up gradually gives the thick layer of fat under the skin time to melt away, leaving a thin, shatteringly crisp crust instead of a rubbery one. Scoring the skin opens channels for that fat to escape and helps it lie flat. Because so much flavorful fat renders out, you have a ready-made cooking fat for the eggs, which ties the plate together with one taste running through it.
Warm, buttery yolk against slices of meat cooked to a rosy medium-rare, with the crackle of the skin on top. Duck breast is a protein-dense cut, and the eggs bring their own complete protein along with the yolks' richness, so a modest plate keeps you full for hours. Salt is the only seasoning it needs, letting the natural flavor of good duck and fresh eggs stand on its own.
Ingredients
- 4 duck breast portions
- 8 large eggs
- 2 tbsp butter
- 3/4 tsp salt
Instructions
- Score the skin: Pat the duck breasts dry with paper towels. With a sharp knife, score the skin in a crosshatch pattern, cutting through the fat but stopping before you reach the meat. Season both sides with salt.
- Start in a cold pan: Lay the duck breasts skin-side down in a cold, dry skillet, then set it over medium heat. Starting cold lets the fat melt out slowly so the skin crisps instead of seizing and burning.
- Render the skin: Cook undisturbed as the fat renders and the skin turns deep golden and crisp, about 8 to 10 minutes. Spoon off or pour away the pooling fat as it builds, and save it for the eggs if you like.
- Flip and finish: Turn the breasts over and cook on the meat side until an instant-read thermometer reads about 130 to 135°F (54 to 57°C) at the thickest point for medium-rare, roughly 3 to 5 more minutes. Move them to a plate to rest while you cook the eggs.
- Fry the eggs: Add butter to the pan (or use a little of the reserved rendered duck fat). Once it foams, crack in the eggs and fry until the whites are set and the yolks are still soft, basting the tops with the hot fat if you want them cooked through. Season with salt.
- Slice and serve: Slice each rested duck breast crosswise into thin strips, angling the knife against the grain. Fan the slices over the fried eggs and serve right away.
Variations
- Fry the eggs in duck fat: Instead of butter, cook the eggs entirely in the fat you rendered from the skin. The eggs pick up a deeper, meatier flavor, and this keeps the plate free of dairy.
- Add hard cheese: Grate a hard aged cheese over the hot eggs so it melts into the yolks. This adds dairy and a salty, nutty edge that plays against the rich duck.
- Soft scramble the eggs: Rather than frying, cook the eggs low and slow in butter, stirring constantly, into a loose, custardy scramble to spoon under the duck slices.
- Add crisp bacon: Lay a few strips of crisp bacon alongside the duck and eggs. This adds pork and a smoky, salty crunch to the plate.
- Use duck eggs: Swap in duck eggs for the chicken eggs. Their larger, richer yolks make the plate even more decadent and cook a touch more slowly, so give the whites a little extra time to set.
Storage & Leftovers
Store leftover duck and eggs in an airtight container in the refrigerator for up to three days. The duck keeps far better than the eggs, so if you know you will have extra, cook only the eggs you plan to eat and refrigerate the seared duck on its own.
To reheat the duck without overcooking it, slice it first, then warm the slices gently in a skillet over low heat with a little butter or rendered duck fat just until they lose their chill, about a minute. Skip the microwave, which turns the crisp skin soft and tough. Fried eggs do not reheat well, so it is best to fry fresh ones to serve alongside the warmed duck.
For a make-ahead morning, sear and rest the duck breasts the night before and refrigerate them whole. In the morning, slice and warm the duck while you fry fresh eggs, and breakfast comes together in just a few minutes.
Notes & Tips
- Choosing duck breast: Smaller Pekin breasts are more common and cook quickly, while larger Moulard breasts are thicker and give you a more generous fan of slices. Either works here; just adjust your timing to the thickness and go by internal temperature rather than the clock.
- Dry skin crisps best: Moisture is the enemy of crisp skin. Pat the breasts very dry before scoring, and if you have time, leave them uncovered in the refrigerator for a few hours so the skin dries out further.
- Save the rendered fat: Duck fat is worth keeping. Pour the melted fat you spoon off into a small jar and refrigerate it; it is excellent for frying eggs on other mornings and keeps for weeks.
- Judge doneness by temperature: Duck breast is best served medium-rare, so an instant-read thermometer is your friend. Pull it at around 130 to 135°F (54 to 57°C) and let the rest carry it a few degrees higher; cooked past medium it turns dry and livery.
- Let it rest before slicing: Give the duck a few minutes off the heat before you cut it so the slices stay juicy rather than bleeding onto the plate. Use the resting time to fry the eggs.
- Salt to taste at the end: Because salt is the only seasoning, taste as you go. A final small pinch of flaky salt over the sliced duck and the egg yolks right before serving makes the flavors pop.
Nutrition & Mindful Eating
- The duck, its own rendered fat and the eggs make this work as one plate. The meat comes out deep pink and dense, the skin comes out crisp, and the eggs cooked in that fat carry the flavor across the plate.
- Duck breast is a red meat with a texture closer to steak than to chicken, and it wants to be cooked to pink and rested. Sliced thin, it brings iron in a form your body takes up easily along with its deep flavor.
- Scoring the skin and starting it in a cold pan is the whole trick. The fat renders out gradually instead of seizing, and what is left is thin, crisp and salted, which is the best bite on the plate.
- Eggs cooked in the rendered duck fat come out with lacy, crisp edges and soft yolks, and those yolks bring choline and the fat-soluble vitamins that sit in the yellow part.
- Duck this rich holds you a long time. The protein is doing most of the work and the fat alongside it slows the meal down, so a few slices with an egg eats like more than it looks.
- As you eat, start with a piece that has skin on it, notice how completely different that crackle is from the soft yolk, and give the plate the full few minutes it deserves.
Frequently Asked Questions
Why do I start the duck in a cold pan instead of a hot one?
A cold start gives the thick layer of fat under the skin time to melt out slowly as the pan heats. That gradual rendering is what leaves you with thin, crisp skin instead of a rubbery layer, and it releases fat you can then use to fry the eggs.
How done should the duck be?
Duck breast is at its best cooked to medium-rare, around 130 to 135°F (54 to 57°C) internal, with a rosy pink center. Unlike chicken, duck is safe and far tastier this way; cooked to well-done it becomes dry and takes on a strong liver-like flavor.
My skin came out chewy instead of crisp. What went wrong?
Usually the culprit is moisture or too much heat too fast. Pat the skin very dry and score it before cooking, keep the heat at a steady medium so the fat renders gradually, and pour off the fat as it pools so the skin fries rather than steams.
Can I use the rendered duck fat for the eggs?
Yes, and it is one of the best parts of this dish. Once you have spooned off some of the fat rendered from the skin, use a little of it in place of or alongside the butter to fry the eggs for a deeper, meatier flavor that ties the plate together.