
Crispy Baked Kale Chips
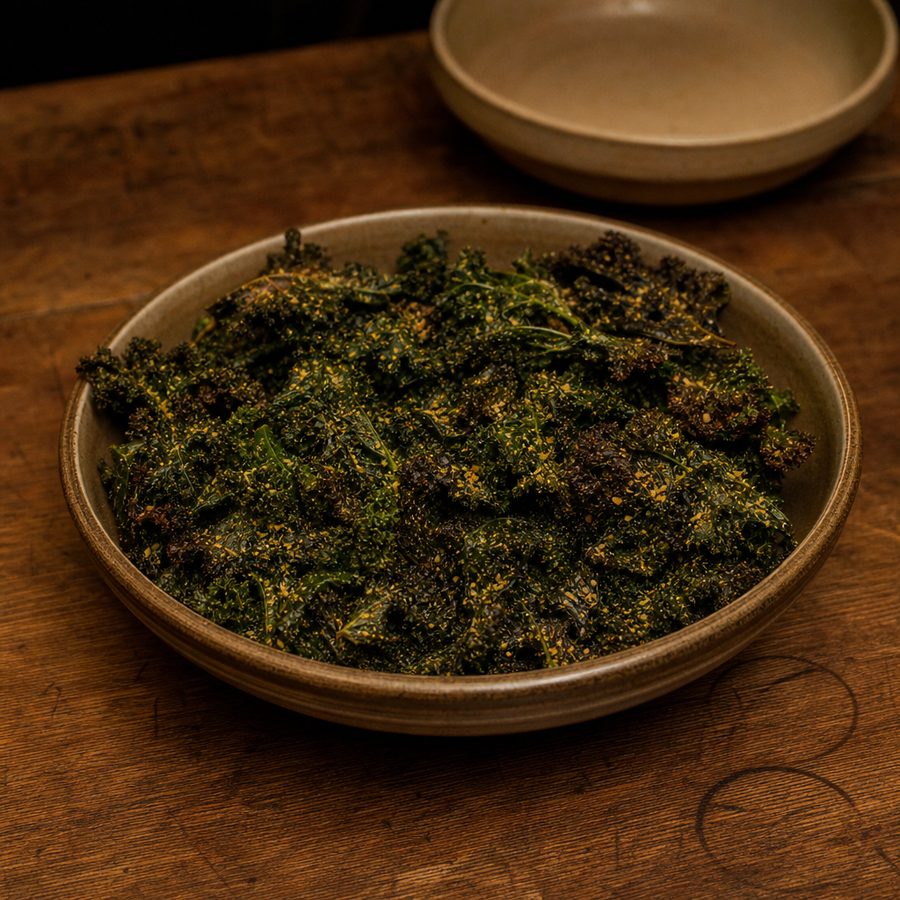
Curly kale torn into big pieces, tossed with olive oil, nutritional yeast, and paprika, then baked low and slow until the leaves turn shatter-light and crisp.
Why You'll Love This Recipe
Kale chips fail for one reason, which is water. A leaf that goes into the oven damp steams itself limp instead of crisping, and no amount of extra time fixes it once that has started. So the washing happens well ahead, the leaves dry in a spinner and then on a towel, and only then does the oil go on, rubbed in by hand until every ruffle has a thin film. Twenty minutes in a low oven after that. It is a good thing to have going on a Sunday afternoon while something else cooks.
The magic is temperature and airflow. A gentle oven slowly drives the moisture out of the leaves so the cell walls collapse into something paper-thin and brittle instead of browning and turning bitter, which is what happens when kale hits high heat. Massaging the oil in by hand, rather than just tossing, coats both sides of every ruffle so the chips crisp evenly, and spreading them in a single layer with room to breathe lets steam escape instead of pooling. Getting the leaves bone-dry before they ever touch the oil is the single step that separates crisp chips from soggy ones.
A chip that shatters with almost no weight to it, then a clean hit of salt and the grassy depth of good olive oil. Kale is rich in fiber and a range of vitamins and antioxidants, and because these are baked rather than fried, the crunch comes from the oven rather than a deep-fry. It is the rare snack where you can eat a generous, satisfying pile and still be eating mostly leafy greens.
Ingredients
- 1 large bunch kale, torn
- 1 tbsp olive oil
- 2 tbsp nutritional yeast
- 1 tsp paprika
- 1/4 tsp salt
Instructions
- Preheat and line: Preheat the oven to 300°F (150°C) and line two rimmed baking sheets with parchment paper. The low temperature is what dries the kale into crisp chips instead of scorching it, so let the oven come fully up to heat before you bake.
- Stem and tear the kale: Rinse the kale well and shake off the loose water. Working with one leaf at a time, fold it along the rib and either pull the leafy part away from the tough center stem or run a knife down each side of the stem. Discard the stems and tear the leaves into large pieces, roughly the size of your palm, remembering that they shrink as they bake.
- Dry thoroughly: Spin the torn kale in a salad spinner, or blot it firmly between clean kitchen towels, until the leaves are completely dry to the touch. Any water left on the leaves turns to steam and gives you limp, soggy chips, so take the time to get them truly dry.
- Massage with oil and season: Put the dry kale in a large bowl, drizzle the olive oil over it, and massage gently with your hands so every leaf, front and back, carries a thin, even coat. Go lightly; too much oil makes them greasy rather than crisp. Sprinkle the nutritional yeast, the paprika, and the salt over the leaves and toss once more so the seasoning clings evenly to the oiled leaves.
- Bake in a single layer: Spread the kale across both lined sheets in a single layer with space between the pieces so they crisp rather than steam. Bake for 20 to 22 minutes, rotating and swapping the pans halfway through, until the leaves are dry, crisp, and still deep green; pull them before they brown, as browned spots taste bitter.
- Cool on the trays: Slide the trays out and let the chips rest on them for about 5 minutes. They firm up and reach their full, brittle crispness as they cool, so resist tasting until they have set. Serve them straight from the trays.
Variations
- Garlic and rosemary: Toss a little garlic powder and finely chopped fresh rosemary in with the salt for a savory, herb-forward chip.
- Lemon and sea salt: Add finely grated lemon zest along with the salt and finish the cooled chips with a light squeeze of lemon juice for brightness.
- Salt and vinegar: Sprinkle the massaged leaves with a little apple cider vinegar before baking for a tangy, salt-and-vinegar bite.
- Savory umami: Trade some of the salt for a light brushing of coconut aminos, which deepens the savory flavor and lends a faint sweetness.
- Golden turmeric: Stir a pinch of ground turmeric and a little garlic powder into the oil before massaging for warm color and an earthy note.
Storage & Leftovers
Kale chips are at their best within a few hours of baking, but they keep for about two to three days stored at room temperature in an airtight container or zip-top bag. Do not refrigerate them; the moisture in the fridge softens them quickly and turns the crunch to chew.
If they lose some crispness, they revive well: spread them on a baking sheet and warm them in a 250 to 300°F (120 to 150°C) oven for a few minutes, just until they crisp again, then let them cool. Skip the microwave, which steams them soft rather than drying them out.
For make-ahead, you can stem, tear, wash, and thoroughly dry the kale a day in advance and keep it wrapped in a towel in the fridge, so all you do at snack time is oil, salt, and bake. The baked chips themselves do not hold as well as freshly made, so bake them as close to serving as you can.
Notes & Tips
- Buy the right kale: Curly kale is ideal here because its ruffles trap oil and crisp beautifully; look for firm, deeply colored bunches without yellowing or wilted leaves.
- Dry is everything: If you have time, wash the kale earlier in the day and let it air-dry on towels, then dry it again after tearing; the drier the leaf, the crisper the chip.
- Go easy on the oil: Use just enough to make the leaves glisten. Puddled oil in the bowl means you have too much, which leads to greasy, heavy chips rather than light ones.
- Salt lightly, then adjust: The leaves shrink dramatically in the oven, so salt tastes more concentrated on the finished chip; start with less than you think and add a pinch more after baking if needed.
- Know when they are done: A finished chip feels dry and weightless and crackles when pressed; if it still bends or feels leathery, give it a few more minutes, watching closely so it stays green.
- Bake a double batch across your oven: These vanish fast, so use every rack you have with pans well spaced; rotate the pans top to bottom halfway so each one crisps evenly.
Nutrition & Mindful Eating
- Kale, olive oil and the yeast and paprika coating work as one thing here. The leaf gives the structure, the oil is what lets the seasoning stick and what turns the edges glassy, and the powders give each chip a savory hit.
- Kale is sturdy enough to survive an oven, which is why it works where a softer green would simply vanish. Baked dry it turns deep green and brittle, and it keeps the vitamin K and the carotenoids that come with a leaf that dark.
- Nutritional yeast is what makes these taste faintly of cheese, a savory, slightly nutty powder that clings to the crinkles of the leaf, and it brings B vitamins along with that flavor.
- Paprika gives the chips their warm rust color and a mild smoky edge, and rubbing the oil into the leaves by hand before seasoning is the step that decides whether they crisp evenly or steam in patches.
- A kale chip shatters rather than crunches, and it disappears almost as soon as it hits your tongue. Eating them slowly enough to notice that is most of the pleasure of the bowl.
- As you eat, let each leaf collapse on your tongue and see how quickly it goes, then pause before the next one and ask whether the craving was for salt or for something to do with your hands.
Frequently Asked Questions
Why did my kale chips turn out soggy?
Almost always it is leftover moisture or crowding. Make sure the leaves are completely dry before they meet the oil, use only a thin coat of oil, and spread the pieces in a single layer with space between them so steam can escape rather than pool.
Why bake at such a low temperature instead of high heat?
A low, slow oven gently drives the water out of the leaves so they turn crisp and stay green. At high heat the thin edges scorch and turn bitter before the leaf has a chance to dry, so patience at a low temperature gives you a better chip.
Can I use a different kind of kale?
Yes. Flat-leaf lacinato kale works and crisps a little faster because the leaves are thinner, so start checking a few minutes early. Curly kale is the classic choice here because its ruffles hold the oil and crisp so well.
How do I keep them crisp after they are made?
Cool them completely, then store them at room temperature in an airtight container; refrigeration adds moisture and softens them. If they go a bit limp, a few minutes in a low oven crisps them right back up.