
Crispy-Skin Duck Breast
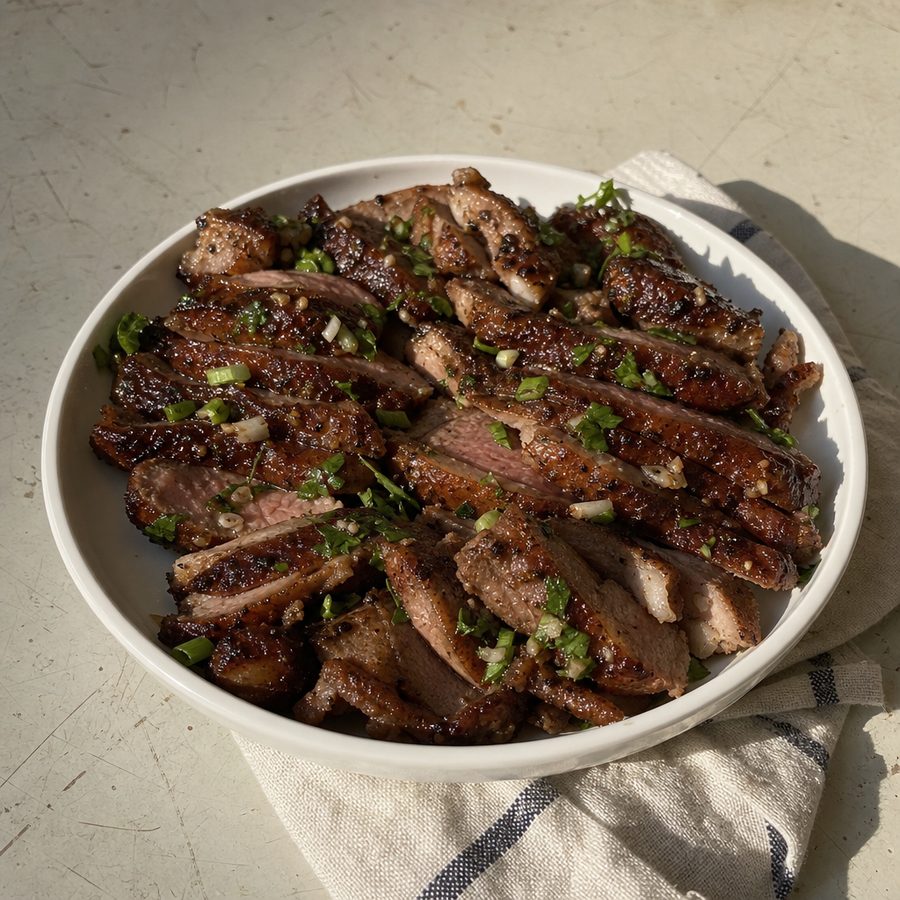
Duck breasts scored and rendered slowly until the skin turns to deep-golden crackling, then basted with butter and sliced to reveal a rosy, tender center.
Why You'll Love This Recipe
The whole thing turns on rendering, which is a slow business and cannot be hurried with heat. A duck breast laid skin down in a cold pan and brought up gently gives its fat away over ten quiet minutes, and what is left behind is skin thin enough to shatter. Rush it and the fat stays where it is, trapped under a skin that browns on the outside and stays soft underneath. Three ingredients and half an hour, most of it standing still, which makes it a better anniversary dinner than most things that take four times as long.
The whole dish lives or dies on how you treat the skin, and the trick is patience rather than heat. Scoring the fat opens channels for it to escape, and starting in a cold pan means the fat melts slowly and evenly instead of tightening and trapping itself. By the time you flip, the skin has thinned into brittle, golden crackling and the meat has barely begun to cook, so the quick second side and a butter baste finish it to a rosy medium-rare. Basting with foaming butter carries heat over the top of the meat and lays down a nutty, browned richness that plain pan-cooking never reaches.
A single cut of duck is substantial, richly flavored, and filling in a way that a plain chicken breast rarely is. The meat is an excellent source of high-quality protein and iron, the rendered skin and butter deliver the fat that makes each bite feel indulgent, and a measured hand with salt is all the seasoning it needs. It eats like a treat while asking almost nothing of you but attention at the stove.
Ingredients
- 4 duck breasts
- 3 1/2 tbsp butter
- 1 tsp salt
Instructions
- Score the skin: Pat the duck breasts dry with paper towels. Lay each one skin-side up and, using a sharp knife, cut a shallow crosshatch pattern into the skin, spacing the lines close together and cutting only through the fat without reaching the meat. Season all over with salt.
- Start in a cold pan: Place the duck breasts skin-side down in a cold, heavy skillet with no added fat, then set the pan over low to medium-low heat. Starting cold lets the fat melt out gradually instead of seizing the skin.
- Render the fat: Cook undisturbed for 8 to 10 minutes as the fat renders and pools in the pan. The skin is ready to turn when it is deep golden brown, thin, and crisp, and most of the fat layer has melted away. Spoon off excess fat as it collects so the skin fries rather than boils.
- Flip and baste: Turn the breasts skin-side up and cook for 3 to 4 minutes. Add the butter to the pan, let it foam, then tilt the pan and spoon the melted butter over the meat repeatedly. Cook to an internal temperature of about 130 to 135°F (54 to 57°C) at the thickest part for a rosy medium-rare center.
- Rest and slice: Transfer the duck to a board and rest, skin-side up, for 5 minutes so the juices settle. Slice each breast crosswise against the grain into thin pieces and serve with the crisp skin on top.
Variations
- Duck fat basted: Skip the butter and baste with the duck fat that renders into the pan instead. This keeps the finish purely from the duck and removes the dairy.
- Crackling side: Trim a little extra skin before scoring, then fry those pieces slowly in the rendered fat until they seize into crisp cracklings to sprinkle over the sliced meat.
- Fried egg on top: Crown each portion with an egg fried in the reserved duck fat, letting the runny yolk fold into the sliced meat. This adds egg.
- Hard cheese finish: Grate a shower of aged hard cheese over the hot, rested slices so it softens against the meat. This adds dairy.
- Surf pairing: Slice the duck over quickly seared sea scallops so the crisp skin meets the sweet, tender shellfish. This adds shellfish.
Storage & Leftovers
Store leftover duck in an airtight container in the refrigerator for up to three days. Keep any slices you have not eaten whole rather than pre-sliced thin, since larger pieces hold their moisture better.
To reheat without toughening the meat, warm the slices gently in a skillet over medium-low heat, or set them under a broiler skin-side up for a minute to re-crisp the skin. Avoid the microwave, which steams the skin soft and can dry out the meat.
For a make-ahead head start, score and salt the breasts and keep them uncovered on a rack in the refrigerator for several hours or overnight. The drier surface renders faster and crisps even better when you cook it.
Notes & Tips
- Buy skin-on breasts: This recipe depends entirely on the fat cap, so look for breasts with an intact, unbroken layer of skin. A thicker fat cap renders into more crackling and more basting fat.
- Dry is crispy: The single biggest factor in crisp skin is a dry surface. Pat the breasts thoroughly, and if you have time, let them sit uncovered in the fridge before cooking so the skin dehydrates slightly.
- Do not skip drying the skin: Water on the skin steams instead of fries and stalls the crisping, so blot away any moisture that beads up during scoring.
- Save the rendered fat: Pour the golden fat left in the pan into a jar and refrigerate it. It keeps for weeks and is excellent for searing meats or eggs later.
- Use a thermometer: Duck breast is easy to overshoot. An instant-read thermometer pulled at about 130 to 135°F (54 to 57°C) gives you a reliably rosy, tender center every time.
- Adjust the salt to taste: Because salt is the only seasoning, taste a slice and finish with a small extra pinch if it needs lifting. A flaky salt sprinkled at the table adds a pleasant crunch.
Nutrition & Mindful Eating
- The skin, the fat underneath it and the meat itself are three different foods that happen to arrive attached. The skin crisps, the fat renders out and becomes the cooking medium, and the meat below stays tender because it was never sitting in a dry pan.
- Duck breast eats more like a steak than like poultry, close-grained and dark, and it carries the iron and B12 that go with meat that color. Cooked to medium rare it slices into clean fans rather than shredding.
- Scoring the skin in a diamond pattern gives the fat a route out, and the slow render that follows is the whole technique. You hear it before you see it, a quiet steady sizzle that goes on far longer than feels reasonable.
- Butter goes in at the end, once the pan is hot and the duck is nearly there, and basting with it browns the surface and fills the kitchen with the smell of toasting milk solids. It brings vitamins A and D along in the fat.
- Duck this rich holds you for a long stretch, and the protein and the rendered fat are doing that together. A modest portion sliced across the grain and fanned out eats like the center of a real dinner.
- As you eat, listen for the crack as the knife goes through the skin, and let a plate this rich be an event you sit down for rather than something you refuel with.
Frequently Asked Questions
Why do I start the duck in a cold pan instead of a hot one?
Starting cold lets the thick layer of fat under the skin melt out slowly and evenly. If you drop the skin onto a screaming-hot pan, the surface seizes and traps the fat inside, leaving you with chewy, greasy skin instead of thin, crisp crackling.
How do I know when the skin is rendered enough to flip?
Look at the color and thickness. The skin should be deep golden brown, feel crisp, and the once-plump fat layer should have thinned out into the pan. That usually takes 8 to 10 minutes over low to medium-low heat.
What internal temperature should duck breast reach?
Pull it at about 130 to 135°F (54 to 57°C) at the thickest part for a rosy, tender medium-rare. The temperature will climb a few degrees as it rests, and cooking much past that firms and dries the breast meat.
Why is my skin turning out chewy instead of crisp?
The two usual causes are a wet surface and too much heat too fast. Pat the skin bone-dry before cooking, score it well so the fat can escape, keep the heat gentle, and spoon off the rendered fat as it pools so the skin fries rather than sits in a puddle.