
Mussel and Potato Croquettes with Chives
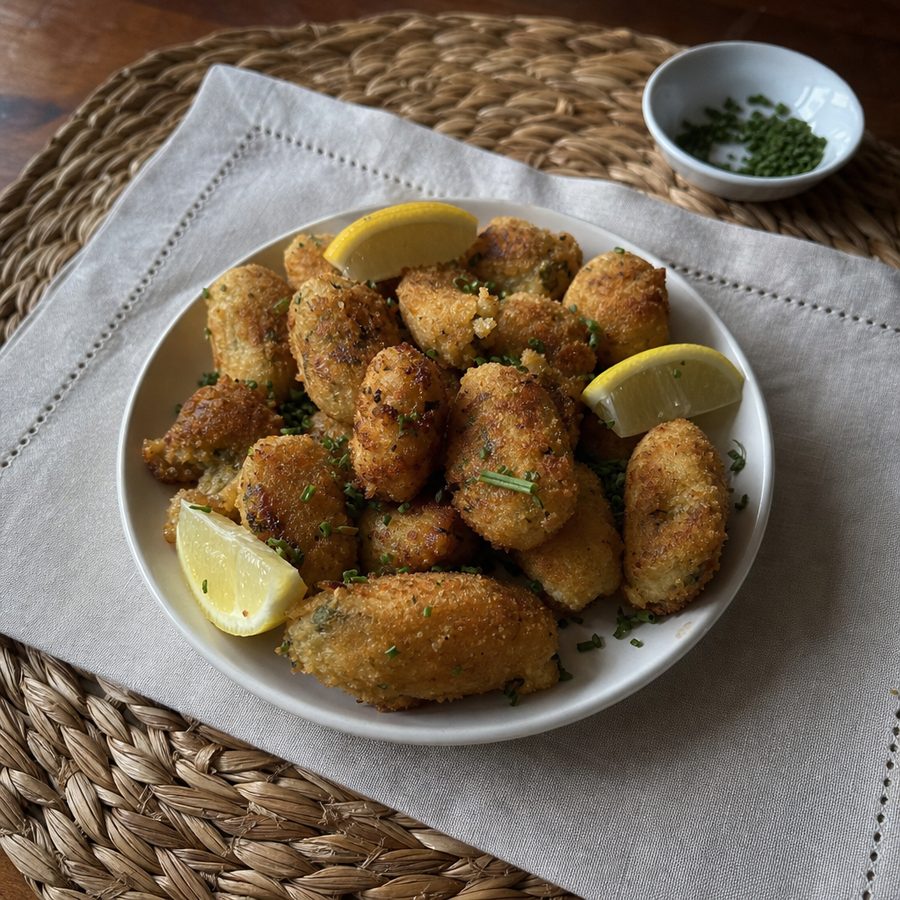
Tender chopped mussels folded into creamy mashed potato with almond flour, egg, snipped chives, and a squeeze of lemon, shaped into little logs and baked until golden and firm.
Why You'll Love This Recipe
These little baked croquettes turn tender mussels and soft mashed potato into a warm, hand-held snack that feels like something from a seaside bistro. They are a smart choice for anyone who wants a satisfying bite built around sweet, briny seafood rather than a heavy fried appetizer, and they are just as at home on a small plate before dinner as they are packed into a lunch. Because they bake rather than fry, they come together with very little fuss and no pot of hot oil to manage.
Textures in balance, and a binder holding them. Mashed potato gives the interior a creamy, pillowy body, while the chopped mussels bring pockets of briny chew throughout. Almond flour and a beaten egg hold everything together and let the outsides firm into a gentle golden crust in the oven, so you get contrast between the crisp-edged shell and the soft center. A little lemon juice sharpens the sweetness of the shellfish, and snipped chives run a fresh, mild onion note through every bite.
What is good about them and what tastes good about them are the same thing. Mussels are one of the most mineral-dense forms of seafood there is, so the croquettes carry a real load of protein along with iron, selenium, and B12. The potato adds gentle, filling starch and potassium, the egg contributes more protein and structure, and the almond flour brings a little healthy fat that helps the whole snack feel more sustaining than its size suggests. Warm, savory, and satisfying, they hold you over without weighing you down.
Ingredients
- 4 lb live mussels in the shell
- 1 russet potato (about 10 oz), mashed
- 1 large egg, beaten
- 1/3 cup almond flour
- 3 tbsp snipped chives
- 1 tbsp lemon juice
- 1/4 tsp salt
Instructions
- Purge the mussels: Put the mussels in a large bowl and cover them with plenty of cold water. Leave them for a minute so they settle and begin to open, then swish them around with your hand so the sand works loose and sinks to the bottom of the bowl. Lift the mussels out with your hands rather than pouring them off, so the grit stays behind, then tip out the cloudy water and refill the bowl with fresh cold water. Repeat until the water stays clear and you no longer see sand settling out, which usually takes three or four changes. Fresh mussels hold more sand than you would expect, and this is the step that keeps it out of the finished dish.
- Scrub and debeard the mussels: Scrub each shell under cold running water with a stiff brush to take off anything still clinging to the outside. Then pull off the beard, the tuft of stringy fibers poking out between the two shells, by gripping it and tugging firmly toward the hinge end. Do this right before you cook, because debearding shortens the life of a live mussel. Throw away any mussel with a cracked shell, and tap any that are gaping open against the counter; keep the ones that pull themselves shut and discard the ones that stay open.
- Steam the mussels: Set the mussels in a pot with a splash of water, cover with a tight lid, and steam over medium-high heat until the shells open, about 5 to 6 minutes. Discard any that stay shut. Lift the meat from the shells, then chop it roughly into small pieces and set it aside. Discard the empty shells.
- Preheat and line: Heat the oven to 400°F (200°C) and line a baking sheet with parchment paper.
- Cook and mash the potato: Peel the potato and cut it into even chunks about an inch across. Boil the chunks in a pot of salted water until a fork slides in easily, about 15 minutes, then drain them well and mash them smooth with a potato masher. Let the mash cool until it is only just warm, so it does not start to cook the egg when everything is mixed.
- Beat the egg and snip the chives: Crack the egg into a small bowl and beat it until the yolk and white are fully blended. Snip the chives into fine pieces with kitchen scissors.
- Mix the croquette base: In a large bowl, fold together the chopped mussels, mashed potato, beaten egg, almond flour, chives, lemon juice, and salt until they are evenly combined into a soft, moldable mixture that holds its shape when you press it.
- Shape the logs: With lightly dampened hands, roll the mixture into eight short, even logs and space them apart on the lined baking sheet.
- Bake: Bake for 20 minutes, turning each log once about halfway through, until the outsides are golden and the croquettes feel firm to a gentle touch.
- Rest and serve: Let the croquettes cool briefly on the sheet so they set, then serve them warm, two to a plate.
Variations
- Smoked paprika and garlic: Work a little smoked paprika and a grated clove of garlic into the base for a warmer, gently smoky flavor.
- Herb swap: Trade the chives for chopped fresh dill or flat-leaf parsley to shift the croquettes toward a brighter, more herbal profile.
- Lemon-zest lift: Add finely grated lemon zest along with the juice for a more pronounced citrus aroma without extra liquid.
- Spicy edge: Fold in a pinch of cayenne or a little minced fresh chile to give the croquettes a mild, lingering heat.
- Parmesan crust: Roll the shaped logs in grated Parmesan before baking for a savory, crisp shell; this adds dairy.
Storage & Leftovers
Keep leftover croquettes in an airtight container in the refrigerator for up to three days. Let them cool completely before sealing so trapped steam does not soften the crust.
To reheat, warm them in a 375°F (190°C) oven or toaster oven for about 8 to 10 minutes until heated through and the outsides crisp up again. A microwave works in a pinch but leaves them softer, so the oven is worth the few extra minutes.
To get ahead, mix the base and shape the logs a day in advance, then keep them covered in the refrigerator and bake fresh when you want them. You can also freeze the shaped raw logs on a tray until solid, transfer them to a bag, and bake straight from frozen, adding a few minutes to the time.
Notes & Tips
- Cool the potato first: Let the mash cool to just warm before you add the egg, so the egg binds the mixture rather than scrambling into it.
- Choose the right potato: A starchy potato like russet mashes fluffier and holds the logs together better than a waxy variety, which can turn gummy.
- Buy mussels smart: If you start from fresh mussels in the shell, pick ones that are tightly closed and smell clean and briny; a stronger fishy odor means they are past their best. Well-drained jarred or frozen cooked mussel meat also works.
- Fix a mix that is too soft: If the base feels too loose to shape, add a little more almond flour a spoonful at a time until the logs hold; if it feels dry, a few more drops of lemon juice loosen it.
- Check for doneness: The croquettes are ready when the outsides are evenly golden and a log feels firm rather than squishy when pressed on top.
- Serve alongside: A dollop of plain yogurt or a lemon-forward dip and a simple green salad round these out into a light meal rather than just a snack.
Nutrition & Mindful Eating
- Mussels, potato and egg are what make a croquette hold together. The potato is the soft body of it, the mussels break through that body in briny little pieces, and the egg sets everything firm enough to keep its shape in the oven.
- Mussels chopped small run through every bite rather than sitting in one place, and they bring a sweet, saline flavor along with dense protein and a generous amount of vitamin B12.
- Potato mashed while it is still hot goes fluffy and takes on whatever is folded into it, and it carries potassium and a gentle, filling starch that makes these eat like real food.
- Almond flour on the outside toasts in the oven into a fine, sandy crispness with a nutty flavor of its own, and it brings vitamin E and a little unsaturated fat into the crust.
- Chives and a squeeze of lemon are what keep these from ever tasting heavy. The chives stay green and sharp through the potato, and the acid at the table lifts the brine of the mussels right up.
- As you eat, listen for the shell of the crust giving way before you reach the soft center, and let a snack be something you sit down with for a moment rather than eat on your feet.
Frequently Asked Questions
Can I use jarred or frozen cooked mussels instead of fresh?
Yes. Drain jarred mussels well or thaw and pat frozen mussel meat dry, then chop and fold them in. Removing excess moisture keeps the mixture firm enough to shape.
My logs fell apart in the oven. What went wrong?
Usually the base was too wet or the mash too warm. Cool the potato before mixing, drain the mussels thoroughly, and add a little more almond flour until the mixture holds its shape when pressed.
Can I fry these instead of baking them?
You can pan-fry the shaped logs in a little oil over medium heat, turning to brown all sides, but the recipe is written to bake them so they crisp with far less fat and no splatter.
What can I serve them with?
Lemon wedges are the simplest match. A cool yogurt or herb dip and a crisp green salad turn them from a snack into a light meal.