
Garlic-Rosemary Root Vegetable Chips
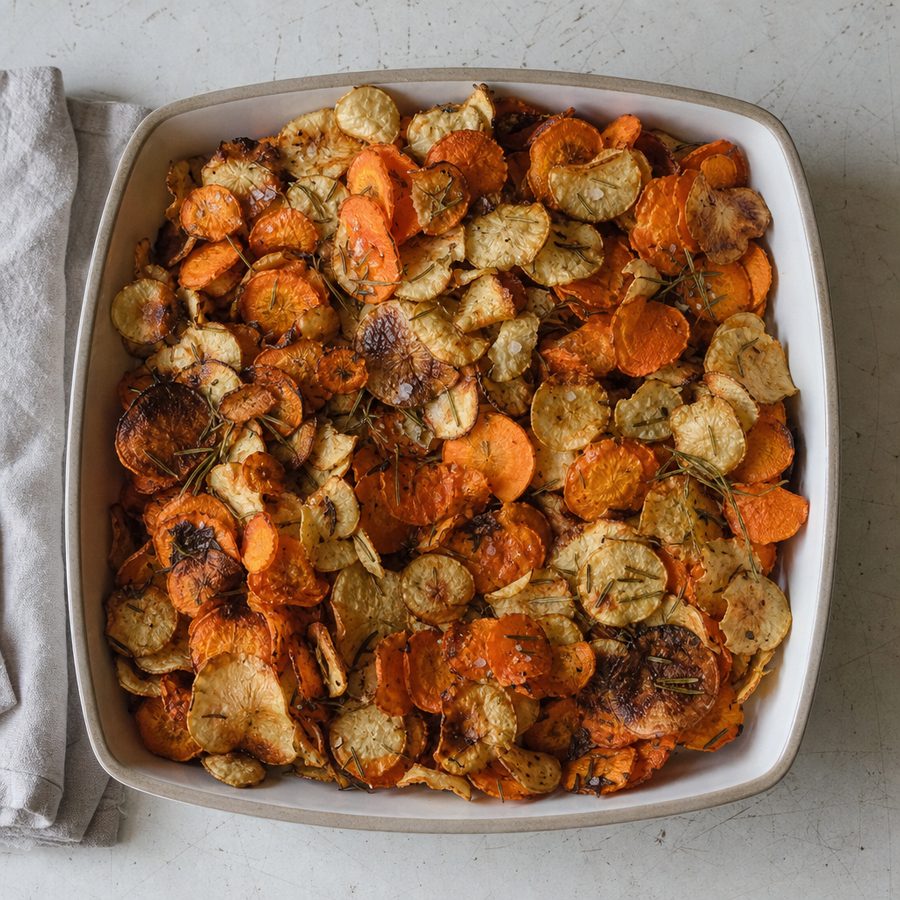
Thin rounds of parsnip and carrot tossed with olive oil, minced garlic, and fresh rosemary, then baked low and slow into fragrant, salt-flecked crisps.
Why You'll Love This Recipe
These are baked vegetable crisps for anyone who wants the crunch and salt of a snack chip from whole roots rather than a fried, packaged product. Parsnip brings a sweet, almost nutty depth and carrot brings color and a rounder sweetness, and together they turn into something you can keep reaching for. They suit a lunchbox, a party bowl, or an afternoon craving, and they are simple enough to make on a quiet evening.
Thin, even slices and an oven kept low. At 325°F (163°C) the goal is to drive moisture out slowly so the sugars concentrate and the edges crisp without burning, which is why a mandoline earns its place here. Patting the slices dry before oiling helps too, because surface water has to evaporate before browning can begin. The olive oil carries the garlic and rosemary onto every slice and helps conduct heat for that even, golden finish, while pulling chips off the pan as they are ready keeps the thinnest ones from crossing into bitter.
A shattering crunch runs up against a concentrated, savory-sweet root flavor, lifted by piney rosemary and mellow roasted garlic. Because they are whole vegetables, they carry real fiber and the natural sweetness comes from the roots themselves rather than added sugar. The olive oil adds a little richness that makes a small handful feel satisfying, so they scratch the chip itch while actually feeding you something.
Ingredients
- 2 medium parsnips, peeled
- 2 large carrots, peeled
- 1 tbsp olive oil
- 2 cloves garlic, minced
- 1 tbsp chopped fresh rosemary
- 1/2 tsp salt
Instructions
- Preheat and prep the pans: Preheat the oven to 325°F (163°C) and line two baking sheets with parchment paper. The low temperature is what dries the slices into crisps instead of scorching them, so give the oven time to come fully up to heat.
- Slice the vegetables thin: Peel the parsnips and carrots. Using a mandoline set to about 1/16 inch (or a steady hand with a Y-peeler for long ribbons), slice them into even, paper-thin rounds. Uniform thickness is the single biggest factor in whether they crisp evenly, so keep the slices as consistent as you can.
- Mince and season: Finely mince the garlic and finely chop the fresh rosemary. Pat the vegetable slices dry between clean towels to remove surface moisture, then toss them in a large bowl with the olive oil, garlic, rosemary, and salt until every slice is lightly and evenly coated.
- Arrange in a single layer: Spread the slices flat across both prepared sheets in a single layer, with no overlap and a little space between pieces. Crowded slices trap steam and turn leathery instead of crisp, so use both pans fully rather than piling them on one.
- Bake, rotate, and flip: Bake for 15 minutes, then rotate the pans front to back and top to bottom and flip each chip. Continue baking another 10 to 15 minutes, watching closely near the end. Pull individual chips as they turn deep golden and firm, since the thinnest slices finish first and the last few minutes move quickly from golden to burnt.
- Cool to finish crisping: Let the chips rest on the pans for 5 to 10 minutes. They firm up considerably as they cool, so a chip that seems slightly bendy straight out of the oven will usually crisp fully on the sheet. Serve once cooled.
Variations
- Thyme and lemon: Swap the rosemary for fresh thyme leaves and add a little grated lemon zest to the oil for a brighter, more floral finish.
- Smoky and warm: Add ground ginger and a pinch of cinnamon to the seasoning for a deeper, warmer flavor that plays well with the sweet roots and skips the nightshades.
- Gentle heat: Toss in a little grated horseradish or a pinch of ground ginger for a slow warmth that balances the natural sweetness of the parsnip and carrot.
- Beet and sweet potato: Trade some of the carrot for thin-sliced beet and sweet potato to add earthier notes and deeper color; slice them just as thin so they crisp on the same timeline.
- Black pepper and garlic-forward: Add cracked black pepper and a little extra minced garlic for a punchier, more savory chip with a bit of bite; peppercorn is a seed that the autoimmune protocol leaves out, so stay with the garlic alone if you are on it.
Storage & Leftovers
Store fully cooled chips in an airtight container at room temperature for up to two days for the best crunch; the refrigerator introduces humidity that softens them, so the counter is the better home. Keep them away from anything moist and do not seal them while still warm, since trapped steam is what turns crisps limp.
If they lose their snap, spread them on a parchment-lined sheet and warm in a 300°F (150°C) oven for a few minutes until they crisp again, then cool. Skip the microwave, which steams rather than dries and leaves them chewy.
To get ahead, slice and season the vegetables earlier in the day and keep them coated and covered in the refrigerator, then bake when you want them fresh and warm. The chips themselves are at their peak within a few hours of baking, so if you can, bake close to serving.
Notes & Tips
- A mandoline is worth it: Even thickness matters more than any other single thing here. A mandoline set thin gives you uniform slices that finish together; hand-slicing leaves some soggy and some burnt because they cook at different rates.
- Choose fat, firm roots: Pick thick, straight parsnips and carrots for wider chips that are easier to slice and turn. Very thin or forked roots give you tiny, fiddly pieces that scorch fast.
- Dry slices crisp better: Take an extra minute to pat the slices truly dry before tossing them in oil. Surface moisture is the enemy of crunch and slows browning noticeably.
- Watch color, not just the clock: Ovens vary, so let deep golden edges and a firm feel be your doneness cue rather than the timer alone. Once they start coloring they finish quickly, so stay nearby for the final minutes.
- Pull the fast finishers early: The thinnest slices and the pieces near the pan edges crisp first. Rescue them as they are ready and let the thicker ones keep going, rather than waiting for the whole pan.
- Salt right out of the oven: If you like a saltier chip, add a light extra sprinkle while they are still warm from the oven, when it clings best. Taste one after cooling before adding more.
Nutrition & Mindful Eating
- Parsnips and carrots roast differently, and that is what makes the bowl interesting. The parsnip goes sweet and almost spicy at the edges, the carrot stays a little chewier in the middle, and the olive oil carries the garlic and rosemary across both.
- Parsnips are the sweeter of the two roots once heat gets to them, with a faint white-pepper note underneath, and they bring a good amount of fiber, including the soluble kind that feeds the bacteria in your gut.
- Carrots give the tray its orange and its candied edges, and their beta-carotene, which your body turns into vitamin A, comes along with the olive oil it needs in order to be absorbed.
- Garlic and rosemary go into the oil before the roots do, so the garlic mellows and the rosemary toasts rather than scorching, and the smell of it about ten minutes in is the reason people wander into the kitchen.
- Slicing thin is the whole technique. Thin slices dry at the edges and curl, salt pulls just enough moisture to the surface to help them along, and you end up with something that shatters rather than bending.
- As you eat, listen for the difference between the shatter of the thin edges and the chew of the thicker middles, and let a handful be its own small event rather than something you finish over the pan.
Frequently Asked Questions
Why did my chips come out chewy instead of crisp?
Almost always it is thickness, moisture, or crowding. Slice as thin and even as you can, pat the slices dry before oiling, and keep them in a single uncrowded layer. Also remember they firm up as they cool on the pan, so give them those few extra minutes before judging.
Do I have to use a mandoline?
No, but it makes a real difference. A Y-peeler can produce long, thin ribbons that crisp nicely, and a sharp knife works if you slice carefully and evenly. The key is consistent thinness so the chips finish at the same time.
Can I make these without peeling the parsnips and carrots?
You can if you scrub them very well, and the skins add a bit of rustic texture. Peeling gives a cleaner look and removes any bitterness that sometimes sits in parsnip skin, which is why the recipe calls for it.
Why bake at such a low temperature?
The low oven dries the slices out slowly so they turn crisp and the natural sugars concentrate without burning. At a higher heat the thin slices would scorch and taste bitter before the centers had a chance to dry.