
Pork Scotch Egg Bites
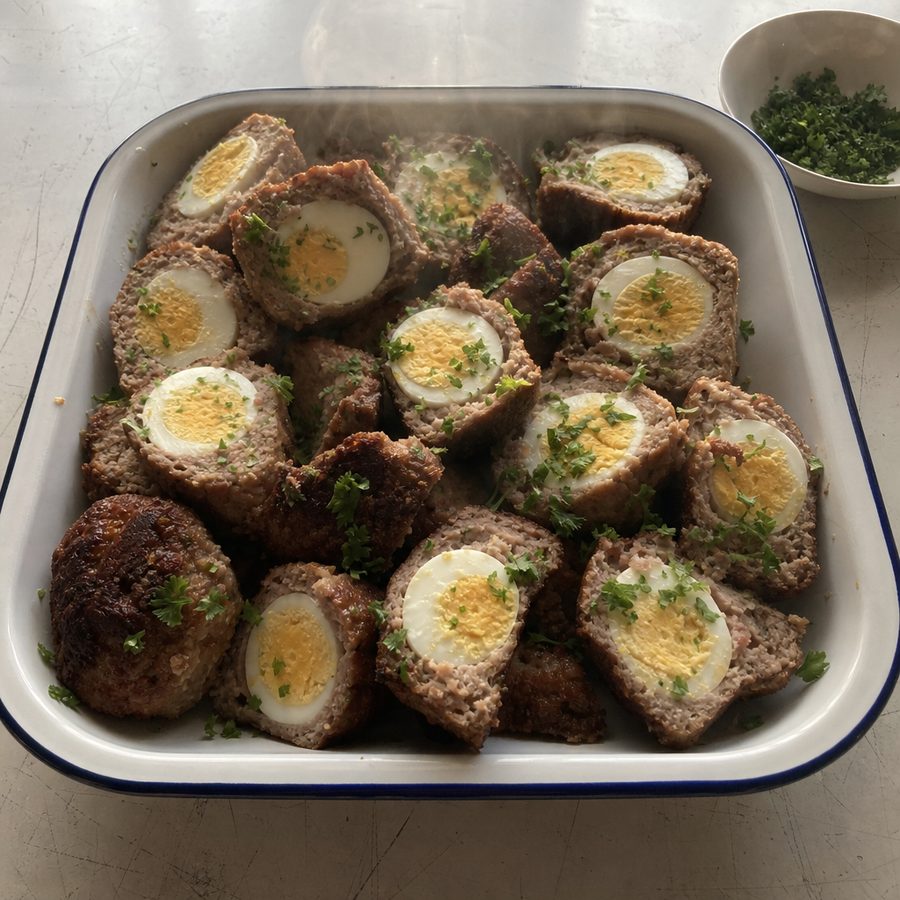
Soft-cooked eggs wrapped in salt-seasoned ground pork and baked until the meat is browned and crisp, with a tender set yolk at the center.
Why You'll Love This Recipe
These are handheld protein bites: a whole egg hidden inside a shell of seasoned ground pork, baked until the outside is crisp and the yolk stays tender. They suit anyone who wants a filling, savory snack they can eat with their hands and carry with them, and they lean on nothing but eggs, pork, and salt to get there. Made ahead, they turn into an easy answer for a mid-morning bite, a packed lunch, or something to eat standing at the counter.
The method is what makes them work. A 7-minute boil sets the whites firmly enough to wrap while leaving the yolk soft, and the ice bath both stops the cooking and makes peeling far cleaner. Baking rather than deep-frying lets the pork brown and render on all sides at once with no oil and no splatter; setting the eggs seam-side down helps the wrapped edge fuse shut so the coating holds together. Baking to an internal temperature of 160°F (71°C) is the reliable cue that the pork is safe and juicy rather than dried out.
The satisfaction comes from contrast: a browned, savory crust giving way to firm white and a creamy yolk. Pork brings rich flavor and a good deal of protein, and the whole egg folds in more protein along with the yolk's fat and micronutrients. Because there is no breading or filler, each bite is dense and filling, the kind of snack that holds you between meals instead of leaving you hungry an hour later.
Ingredients
- 4 large eggs
- about 2/3 lb ground pork (300 g)
- 1/4 tsp salt
Instructions
- Boil the eggs: Lower the eggs gently into a pot of boiling water and cook for 7 minutes for a barely-set, tender yolk. Transfer them straight into a bowl of ice water and let them cool for a few minutes; this stops the cooking and firms the whites so they peel cleanly.
- Peel: Tap each cooled egg all over and peel it under a thin stream of cool running water, working from the wide base where the air pocket sits. Peel carefully so the whites stay intact, since torn whites make the eggs harder to wrap. Pat them dry.
- Season and portion the pork: Put the ground pork in a bowl, add the salt, and mix with your hands just until the salt is evenly worked through; don't overmix or the meat turns dense. Divide the pork into equal portions, one for each egg.
- Wrap: Flatten one portion of pork in your palm into a thin, even patty a little wider than an egg. Set a peeled egg in the center and gently cup the meat up and around it, pinching and smoothing until the egg is fully and evenly enclosed with no bare spots or thick seams. Repeat with the rest.
- Arrange: Preheat the oven to 400°F (200°C). Line a rimmed baking sheet with parchment and set each wrapped egg seam-side down, spaced apart so the heat can reach all sides.
- Bake: Bake for 22 to 25 minutes, until the pork is browned and cooked through and an instant-read thermometer pushed into the meat reads 160°F (71°C). Let them rest a few minutes before serving, since the coating firms as it cools.
Variations
- Ground beef shell: Swap the ground pork for ground beef; it wraps a little firmer and gives a deeper, beefier crust. This changes the meat to beef.
- Ground lamb shell: Use ground lamb in place of the pork for a richer, more savory coating. This changes the meat to lamb.
- Cheese-stuffed: Press a thin piece of hard cheese against the egg before wrapping it in pork so it melts inside as it bakes. This adds dairy.
- Bacon-wrapped: After coating each egg in pork, wind a strip of bacon around the outside before baking for a smoky, salty crust. This adds cured pork.
- Softer or firmer yolk: Boil the eggs a minute less for a looser, jammier center or a minute more for a fully set yolk, adjusting to how you like it. This changes nothing but the eggs' texture.
Storage & Leftovers
Keep the baked eggs in an airtight container in the refrigerator for up to 4 days. Let them cool fully before sealing so trapped steam doesn't soften the crust.
To reheat, warm them in a 350°F (175°C) oven or toaster oven for about 8 to 10 minutes until heated through; this crisps the pork back up. A microwave works if you're in a hurry, but the coating goes soft rather than crisp, so the oven is worth the extra minutes.
To get ahead, boil and peel the eggs a day in advance and keep them refrigerated, or fully wrap the raw eggs in seasoned pork and hold them covered in the fridge, then bake straight from cold, adding a couple of extra minutes. They also travel well once baked and chilled, which makes them handy to pack.
Notes & Tips
- Buy the eggs a little older: Very fresh eggs cling to their shells and tear during peeling. Eggs that have been in the fridge a week or two peel noticeably more cleanly, which matters here since torn whites are hard to wrap.
- Pick pork with some fat: A standard ground pork with a bit of fat browns and stays juicy; a drier grind can bake up dry and crack. If your pork looks pale and dry, wrap it a touch thicker.
- Wet your hands to wrap: Ground pork sticks to dry skin and tears as you shape it. Lightly dampen your palms with water and the meat smooths around the egg easily with no bare patches.
- Seal the seam well: The most common failure is the coating splitting open in the oven. Pinch and smooth the seam closed, then set it seam-side down so gravity and the pan heat help it fuse.
- Trust the thermometer: Because the pork wraps a cooked egg, color alone can fool you. An instant-read thermometer reading 160°F (71°C) in the meat is the surest sign they're done without overbaking.
- Adjust salt to the meat: Taste depends on your pork and your preference. Pinch off a tiny bit of the seasoned raw mixture, cook it in a dry pan for a few seconds, taste, and add more salt to the batch if it needs it before wrapping.
Nutrition & Mindful Eating
- Pork and egg is the whole thing, and the two halves do different jobs. The meat browns and firms into a savory shell, the egg inside stays tender, and biting through one to the other is the entire pleasure of it.
- Ground pork holds seasoning well and stays juicy as it bakes, firming into a shell that keeps its shape around the egg, and it carries a dense protein along with thiamine and B12.
- The egg at the center is the reason to make these. Cooked to the right point, the white sets while the yolk stays soft and rich, and that yolk brings choline and vitamins A and D in a single golden spoonful.
- The outside is where the flavor concentrates. As the pork bakes, its surface dries and browns, the fat renders into the crust, and the salt worked through the meat pulls that savory depth all the way to the surface.
- These are dense for their size, and the protein in the pork and the egg together is why one or two of them hold you longer than something that small suggests.
- As you eat, break one open and look at the yolk before you take a bite, then go slowly enough to notice the crisp brown shell giving way to something soft in the middle.
Frequently Asked Questions
Why did the pork coating crack open in the oven?
Usually the seam wasn't fully sealed or the coating was uneven. Pinch the pork closed all the way around, smooth out any thin spots, and bake seam-side down so the edge fuses instead of pulling apart.
Can I fry these instead of baking them?
You can, but baking is what this recipe is built for: it browns the pork on all sides at once with no oil and no splatter. If you pan-fry, you'll need to turn them to cook the meat evenly all the way around and still confirm the pork reaches 160°F (71°C).
How do I keep the yolk from turning fully hard?
The yolk keeps cooking a little during baking, so start from a 7-minute boil and an ice bath, and don't overbake. Pull them as soon as the pork hits 160°F (71°C) for the tenderest center.
Are these good cold?
Yes. Once baked and chilled they hold together well and taste savory straight from the fridge, which makes them easy to pack. If you prefer the crust crisp, a few minutes in a hot oven revives it.