
Salted Taro Chips
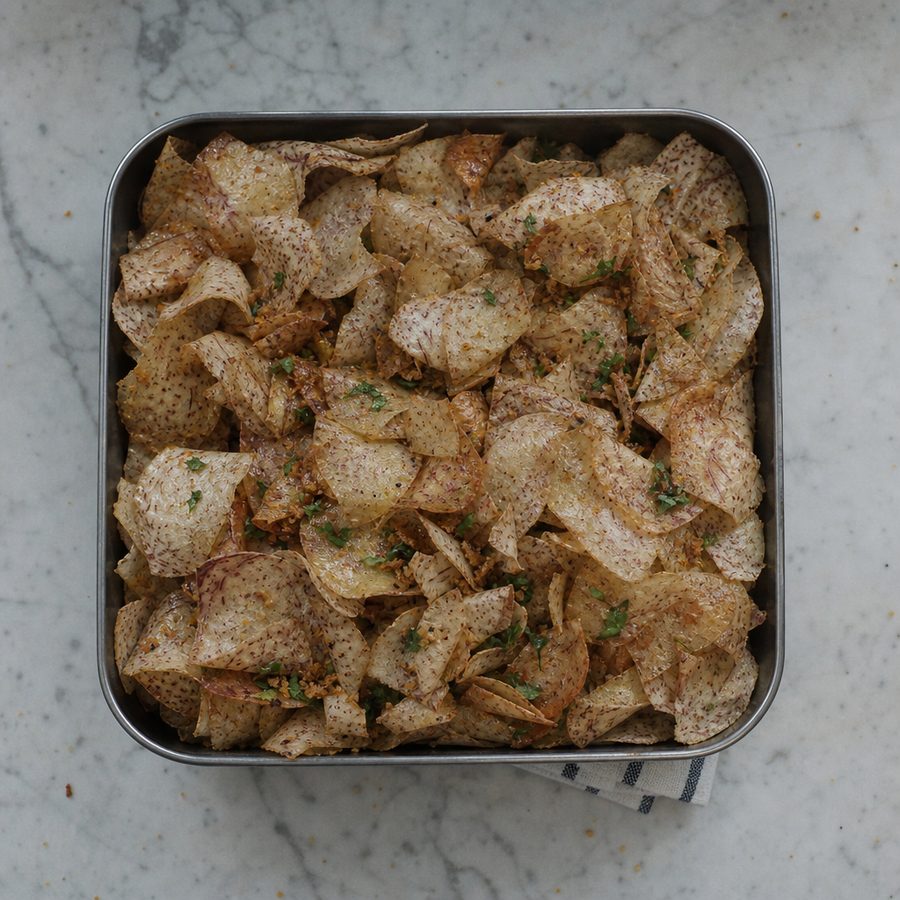
Thin rounds of taro roasted in coconut oil and finished with a whisper of sea salt until crisp, nutty, and flecked with their natural lilac streaks.
Why You'll Love This Recipe
If a chip is what you want tonight, this is forty minutes away and most of that is the oven's time rather than yours. Taro is worth walking past the potatoes for: it roasts up nuttier and earthier than a fried chip, and the whole recipe is three ingredients, the root itself, coconut oil, and sea salt. It suits anyone who reads labels closely and would rather not, and it is forgiving enough that a beginner gets it right the first time.
Pat the slices dry and lay them flat with room to spare. Taro holds a lot of starch and surface moisture, and if you skip the patting-dry step the rounds steam and stay chewy. A thin, even cut matters just as much: coin-thick slices give up their moisture at the same rate and reach that clean snap together. The coconut oil carries the salt across every surface and helps the edges crisp and take on a little color, while the low-and-slow roast draws the water out gradually so the chips dry through rather than scorch.
Real texture, and a slow-burning kind of fullness behind it. Taro is a starchy root high in fiber, so a handful actually settles the appetite rather than leaving you reaching for more. The sea salt hits right up front, the flesh tastes gently sweet and nutty, and the lilac flecks are the plant's own pigment, not a dye. It is the sort of snack that feels like a treat but leaves you steady afterward.
Ingredients
- 2 medium taro roots (about 400 g cooked)
- 2 tbsp coconut oil, melted
- 1/2 tsp sea salt
Instructions
- Preheat and prep the pans: Preheat the oven to 375°F (190°C) and line two baking sheets with parchment paper. Roasting on two sheets keeps the slices in a single layer so they crisp rather than steam.
- Peel and slice the taro: Peel the taro roots fully, removing the fibrous brown skin down to the pale, lilac-streaked flesh. Using a mandoline or a sharp knife, slice the roots into thin, even rounds, about the thickness of a coin, so they roast at the same rate. Taro can leave a slightly slippery, starchy film on your hands; rinse and dry your hands after peeling if it bothers you.
- Dry the slices: Pat the rounds thoroughly dry between clean kitchen towels or paper towels. Removing surface moisture and starch is what lets the chips turn crunchy instead of leathery.
- Coat with oil and salt: Place the slices in a large bowl, pour over the melted coconut oil, add the sea salt, and toss gently with your hands until every round is glossy and lightly coated. Work in batches if needed so the oil reaches all of them.
- Arrange in a single layer: Lay the slices flat on the lined sheets in a single layer, edges not overlapping. Any that stack will stay soft in the middle.
- Roast until crisp: Roast for 24 to 28 minutes, flipping each round once at the halfway mark, until the chips are firm, dry, and lightly golden at the edges with their lilac flecks showing. The centers may still feel slightly soft when hot; they finish crisping as they cool.
- Cool on the trays: Slide the sheets out and let the chips cool completely on the trays before serving. Cooling in place is when they set into a shattering crunch.
Variations
- Rosemary and garlic: Toss the slices with finely chopped fresh rosemary and a little garlic powder along with the oil and salt for a savory, aromatic edge.
- Golden turmeric and ginger: Add ground turmeric and ground ginger to the oil for a warm, earthy, sunset-colored chip. Turmeric can stain your bowl, so toss in a container you do not mind coloring.
- Cinnamon warmth: Dust the oiled slices with ground cinnamon before roasting for a gently sweet, fragrant version that leans toward a treat.
- Olive oil finish: Swap the coconut oil for extra-virgin olive oil for a more savory, grassy note and slightly crisper edges.
- Fresh herb shower: After the chips cool, sprinkle them with finely chopped fresh chives or parsley for a bright, green finish alongside the salt.
Storage & Leftovers
Keep the cooled chips in an airtight container at room temperature for up to three days; they hold their crunch best when they are not refrigerated, since the cold, damp air of a fridge softens them. If your kitchen is humid, tuck a folded paper towel into the container to absorb stray moisture.
If they lose their snap, revive them by spreading the chips on a baking sheet and warming them in a 300°F (150°C) oven for a few minutes, then letting them cool again on the tray. Skip the microwave, which turns them rubbery rather than crisp.
To get ahead, you can peel and slice the taro earlier in the day and hold the rounds submerged in cold water to keep them from browning; drain and pat them very dry before oiling and roasting. The finished chips are best eaten within a day or two of baking, so roast close to when you plan to serve them.
Notes & Tips
- Pick firm, heavy roots: Choose taro that feels dense and firm with no soft spots or mold at the ends. A heavy root for its size means it is fresh and moist inside, which slices cleanly.
- A mandoline is worth it: Even thickness is the single biggest factor in whether the chips crisp together. A mandoline gives you uniform coin-thin rounds far faster and more evenly than a knife; use the guard to protect your fingers.
- Do not crowd the pans: Give each slice a little breathing room. Overlapping rounds trap steam and stay soft; if you have more than fits, roast a second batch rather than piling them on.
- Judge doneness by the edges: The chips are ready when the edges are dry and lightly golden and the rounds feel firm, not floppy, when you lift one. Remember they crisp further as they cool, so pull them before they brown deeply.
- Salt while warm for grip: If you want a little extra salt, add it right as the chips come out of the oven while the surface is still warm, so it sticks rather than sliding off.
- Serve with a dip that fits: These are sturdy enough to scoop; a mashed avocado or a coconut-based dip pairs well without overpowering the nutty taro. Guacamole made without tomato keeps it in the same spirit.
Nutrition & Mindful Eating
- Taro, coconut oil and heat are all this takes. The oil coats each slice so it crisps evenly, the salt draws out the faint sweetness in the root, and the oven does the rest until the edges curl and go brittle.
- Taro is a starchy root with a mild, nutty, almost vanilla flavor once it roasts, and its starch includes the resistant kind that feeds the bacteria in your gut on the way through.
- The lilac flecking through each chip comes from the pigments in the root itself, which are antioxidants as well as decoration, and they hold their color through the oven so the finished tray looks like nothing else in the cupboard.
- Coconut oil stays stable at roasting temperature, which is why the chips brown rather than turn greasy, and it leaves a faint sweetness at the back of each bite along with fats the body burns readily.
- Thin slicing is the whole trick. Cut fine enough, the chips dry out completely in the oven and snap loudly at the first bite, and they keep snapping as they cool on the tray.
- As you eat, listen for that first snap and let the nutty warmth arrive behind it, and try taking a few at a time from a bowl rather than working through the tray on your feet.
Frequently Asked Questions
Why are my taro chips chewy instead of crunchy?
Almost always it is leftover moisture or slices cut too thick. Pat the rounds very dry before oiling, cut them coin-thin and even, and keep them in a single layer so they roast rather than steam. Letting them cool fully on the tray is also essential, since that is when they set into a crisp snap.
Do I need to peel the taro?
Yes. The fibrous brown skin is tough and unpleasant to eat, so peel each root down to the pale, lilac-streaked flesh before slicing. The starchy film taro leaves on your hands is harmless; just rinse and dry your hands afterward.
What do the purple flecks mean, is the taro spoiled?
Not at all. Those lilac and purple streaks are the taro's own natural pigment and are a sign of good, fresh flesh. They are what give the chips their pretty speckled look once roasted. Discard a root only if it has soft, gray, or moldy spots.
Can I fry these instead of roasting them?
You can, but this recipe is written for the oven, which uses far less oil and is more hands-off. Roasting at a moderate temperature dries the slices through evenly for a clean crunch without standing over hot oil.