
Seared Duck Breast Lunch
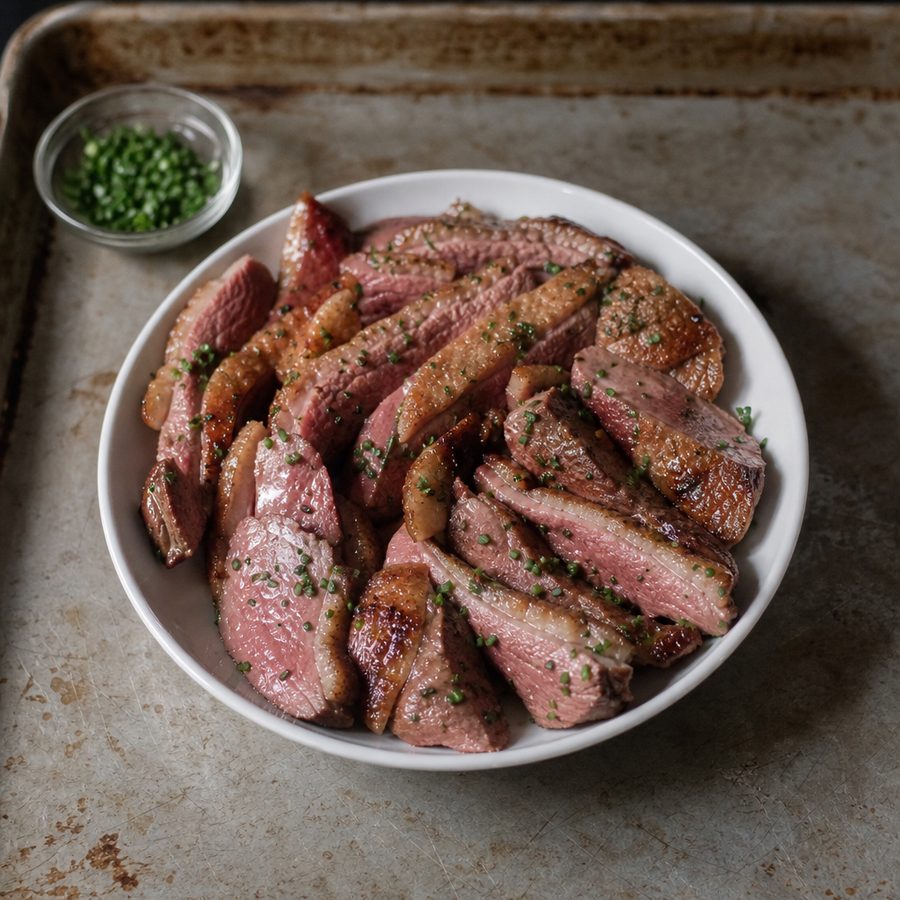
Duck breast with the skin scored and rendered until deeply crisp, sliced thin across the grain, and finished with a spoon of melted butter.
Why You'll Love This Recipe
This is a quiet, restaurant-caliber lunch built around a single cut of meat done well. Seared duck breast rewards patience more than skill: score the skin, start it in a cold pan, and let time do the work while you set the table. It suits anyone who wants a rich, deeply savory midday meal that leans entirely on meat and fat, with nothing on the plate but the duck and the butter it is basted in.
The whole dish turns on how you handle the skin. Starting the breast in a cold, dry skillet and bringing the heat up slowly gives the thick fat layer time to melt and drain away before the skin can burn, so it renders down to a thin, crackling crust rather than a chewy band of fat. The crosshatch scoring opens channels for that fat to escape and helps the skin lie flat. Finishing flesh-side down with foaming butter spooned over the top browns the surface and carries flavor into every slice. Slicing across the grain at the end keeps each bite tender.
Shatter-crisp skin sits over meat cooked to a rosy medium, and all of it is enriched by butter and the duck's own rendered fat. Duck breast is rich, deeply colored meat that delivers a large amount of complete protein along with iron, zinc, and B vitamins, so a modest portion eats as a full, sustaining meal. It holds you for hours without anything else on the plate.
Ingredients
- 4 duck breasts (about 6 oz each)
- 3 tbsp butter
- 1 tsp salt
Instructions
- Dry the breasts and score the skin: Pat the duck breasts completely dry with paper towels, since dry skin is what crisps and wet skin steams. Score the skin in a tight crosshatch about half an inch apart, cutting down through the fat but stopping before the meat: if the knife reaches the flesh, juice runs out into the pan and the skin boils rather than fries. Season both sides with the salt and leave them skin side up for a few minutes while the pan sits empty.
- Start them in a cold, dry pan: Lay the breasts skin side down in a cold skillet with no fat in it and only then set the pan over medium heat. Starting cold gives the fat under the skin time to melt gently and run out before the skin itself starts to brown, which is the whole trick with duck. Leave them undisturbed for 8 to 10 minutes. The sound will go from silence to a steady quiet sizzle as the fat renders out.
- Pour the fat off as it collects: Twice during that first stretch, tip the pan carefully and spoon or pour the rendered fat into a heatproof jar. A breast sitting in a quarter inch of its own fat is being confit rather than seared, and the skin comes out soft. Keep the fat: it is worth more than most things in the refrigerator door, it keeps for months, and potatoes fried in it are the reason anybody makes duck a second time.
- Turn them and cook to a temperature you have chosen: When the skin is deep brown and crisp, turn the breasts and give them 3 to 4 minutes on the flesh side, adding the butter and spooning it over as they finish. Duck breast is traditionally served at about 135°F, still pink in the middle, which is what this timing gives you. The USDA figure for all poultry is 165°F, so cook to whichever you have decided on, and use a thermometer rather than the clock to get there.
- Rest them skin side up, then slice thin: Move the breasts to a board and rest them skin side up for 5 minutes, uncovered. Skin side up keeps the crust out of the juices collecting underneath, and uncovered keeps the steam off it; a breast tented with foil loses in three minutes what it took ten to build. Slice thin across the grain and spoon over whatever butter and juice is left in the pan.
Variations
- Basted in duck fat: Skip the butter and baste the meat with a spoonful of the fat you rendered out of the skin. This removes the dairy and gives a cleaner, purely duck-forward richness.
- Basted in beef tallow: Swap the butter for beef tallow for a firmer, more neutral fat and a slightly beefy background note. This trades the dairy for beef fat.
- Finished with hard cheese: Shave a hard aged cheese over the warm slices so it softens against the meat. This adds dairy and a salty, nutty edge.
- With eggs fried in the fat: Fry eggs in the hot rendered duck fat and serve them alongside the sliced breast. This adds eggs and turns the plate into a heartier meal.
- Cooked to medium-well: Leave the breast flesh-side down a couple of minutes longer, to about 150°F (65°C) internal, for a firmer, less pink slice if you prefer meat cooked through.
Storage & Leftovers
Store cooled, sliced duck in an airtight container in the refrigerator for up to three days. Keep any rendered fat and pan butter in a separate small jar in the fridge, where it will firm up and keep for weeks.
To reheat without overcooking the medium interior, warm the slices gently in a skillet over low heat with a little of the saved fat, just until heated through. Duck is also excellent cold, straight from the fridge, which sidesteps the reheating problem entirely and keeps the skin from turning rubbery.
To get ahead, score and salt the breasts a day in advance and leave them uncovered on a rack in the refrigerator. The dry, cold air pulls moisture from the skin overnight so it crisps faster and more evenly when you cook it the next day.
Notes & Tips
- Choosing the duck: Look for breasts with a thick, unbroken fat cap and pale, dry-looking skin. If the skin feels tacky, leave the breasts uncovered on a rack in the fridge for a few hours before cooking to dry it out.
- Save the rendered fat: The clear fat that pours off during rendering is the best part of the deal. Strain it into a jar and keep it refrigerated to cook with later; it delivers deep flavor with almost no effort.
- Trust a thermometer: An instant-read thermometer takes the guesswork out. Pull the breasts at about 135°F (57°C) for a rosy medium; they will climb a few degrees as they rest.
- Do not skip the rest: Cutting in too early lets the juices run out onto the board and leaves the slices drier. Five minutes of rest, skin-side up, is enough for a breast this size.
- Season at the very end too: A pinch of flaky salt scattered over the cut slices wakes up the whole plate. Add it after slicing so the crystals stay crisp and you can taste as you go.
- Serve it cold, too: Cold sliced duck makes a fast second lunch straight from the fridge, so it is worth cooking an extra breast while the pan is already hot.
Nutrition & Mindful Eating
- Duck, butter and salt is the entire list, and the cooking is what turns it into a meal. The rendering fat crisps the skin, the butter carries that flavor back over the meat as you baste, and the salt pulls both of them forward.
- Duck breast is dark, close-grained meat with a deep, almost gamey flavor, and it stays tender and pink through the middle if you take it off the heat early. It is dense with complete protein and carries iron in the form your body absorbs most readily.
- The skin is the reason to score the fat in a crosshatch and start the breast in a cold pan. Ten minutes of gentle heat melts the fat out from under the skin and leaves a thin crackling sheet behind, and what renders out is largely the monounsaturated kind of fat.
- Butter goes in at the end and foams around the meat as you tip the pan and spoon it over. It smells nutty as the milk solids brown, it clings to the crust, and it carries a little vitamin A along with all that flavor.
- A single breast holds you well into the afternoon. Protein this dense does most of that work, along with the zinc and B12 that dark meat carries, and it is why a lunch this simple still eats like a full meal.
- As you eat, cut across the grain and notice how the crackling skin gives way to the soft pink meat underneath, and let a lunch this short be one you actually sit down for.
Frequently Asked Questions
Why start the duck in a cold pan instead of a hot one?
The fat layer under the skin is thick and needs time to melt out. A cold pan brought up slowly gives that fat a head start to render and drain away, so the skin ends up thin and crisp instead of a chewy band. A screaming-hot pan browns the outside before the fat has a chance to leave.
How do I know when it is cooked to medium?
An instant-read thermometer in the thickest part is the surest guide; pull the breast around 135°F (57°C) for a rosy medium and let it rest, during which it climbs a few degrees. The three to four minutes on the flesh side is a starting point, but thickness varies, so check the temperature.
My skin came out chewy instead of crisp. What went wrong?
Usually one of two things: the skin was not dry enough going in, or the heat was too high too fast, so the outside set before the fat rendered. Pat the skin bone-dry, score it well, keep the heat at a steady medium, and pour off pooling fat so the skin fries rather than sits in a puddle.
Can I eat the leftovers cold?
Yes, and it is one of the best ways to enjoy it. Cold sliced duck keeps its texture and flavor straight from the fridge, which avoids the risk of overcooking the pink center when reheating. If you would rather warm it, do so gently over low heat.